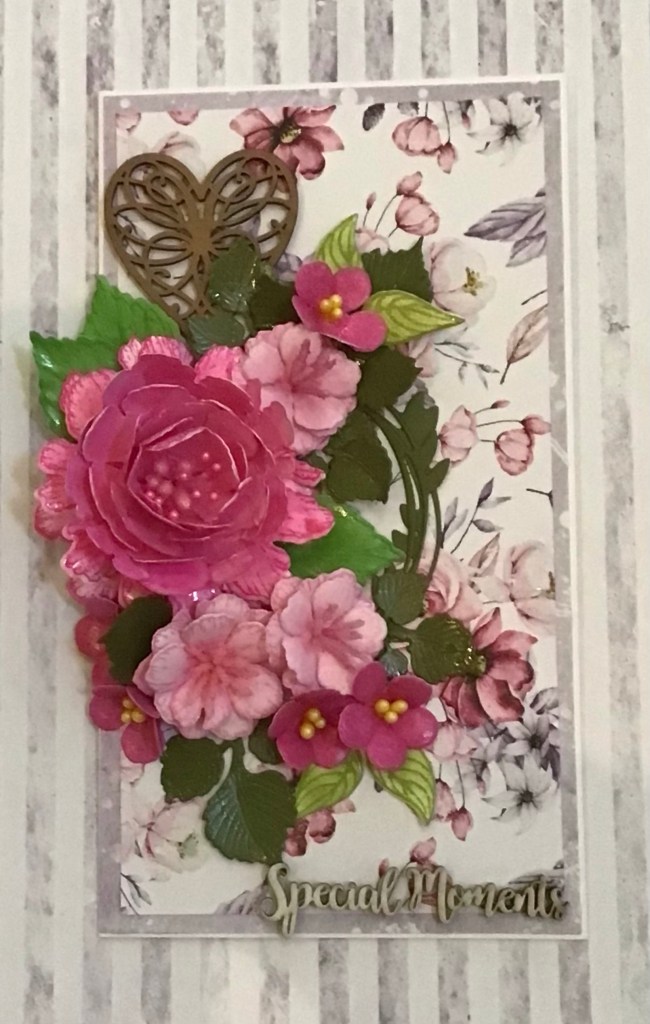
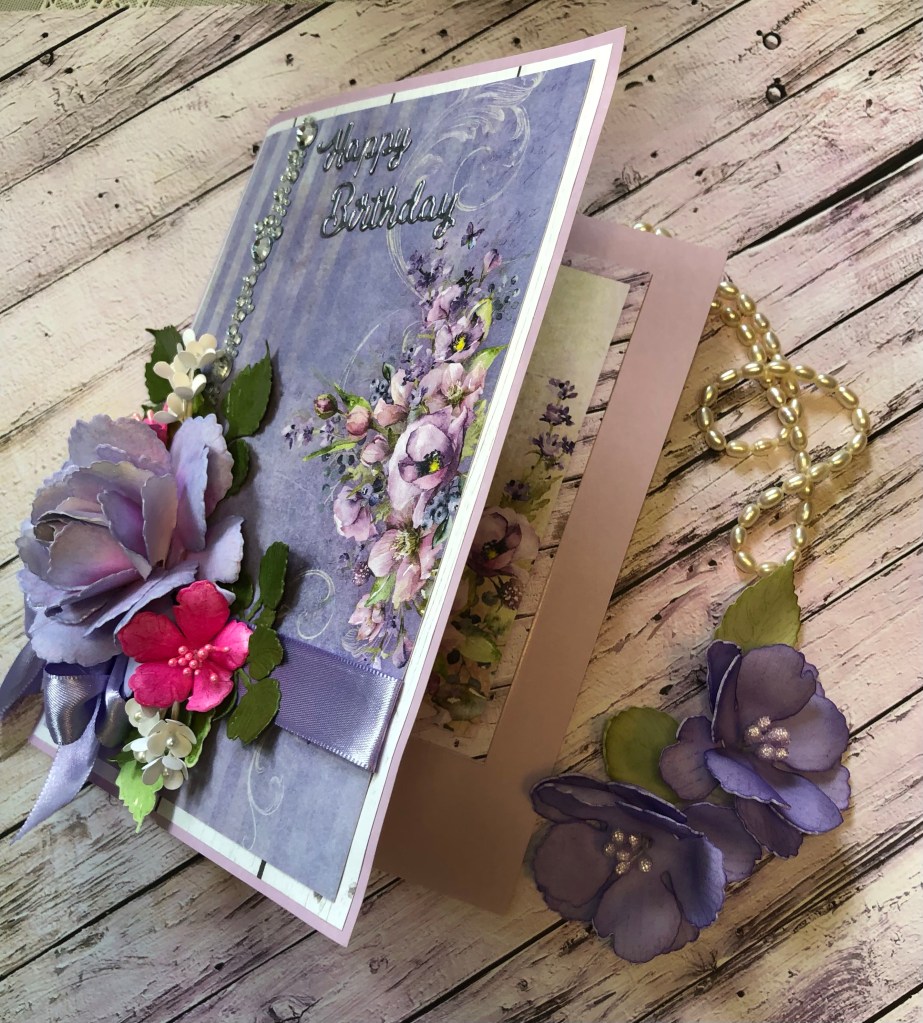
A little late this week, meant to post this yesterday! This is a simple card using Mintay’s “Graceful” paper, a couple of pressed wood accents, and of course my favorite Heartfelt Creations handmade flowers, using a peony, some wild roses, and some dark pink blossom. I just love pink!!
The inside has one of the cut aparts from the paper pack – they generally have about 12/page – so cute, I suppose they might even be made into little mini-cards, or even gift tags (Ha! Just thought of that!).
A close up of my flowers, especially the peony & wild roses
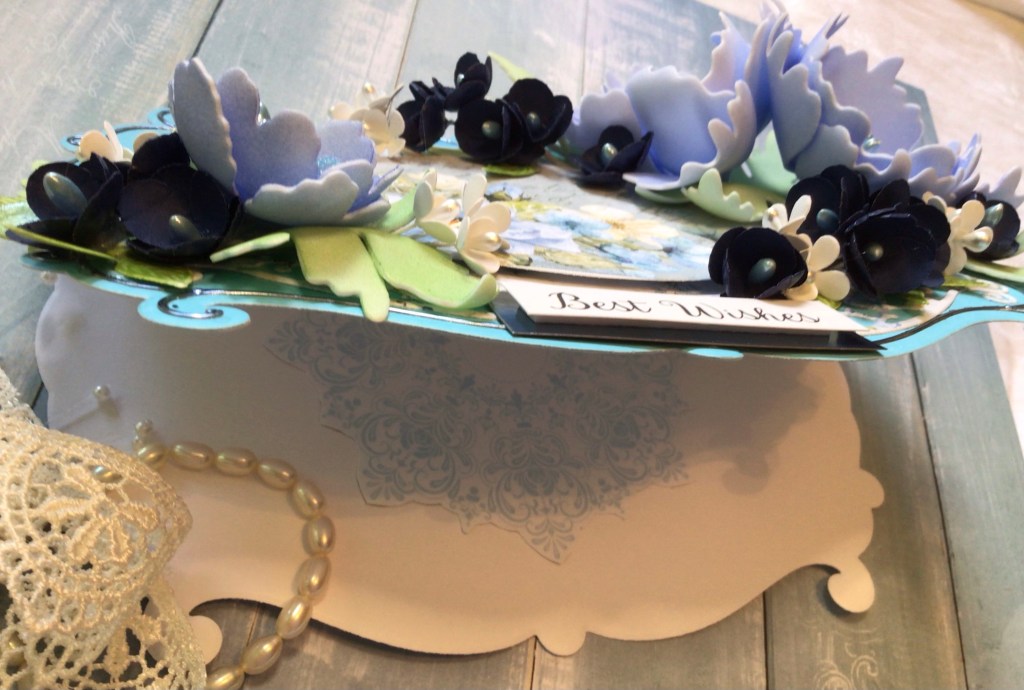
Sweet Hydrangea from Heartfelt Creations….inspired by a card from the ubiquitous Kathy Clements. I haven’t used this collection for quite some time, but spent part of my Sunday playing around with it. I have fallen in LOVE with shaker boxes — it’s hard to tell without a video, but behind the little window are some tiny silver sprinkles (star shaped!) – shaker boxes are so easy when you have a kit! Thank you Creative Expressions!!
This starts off with generic cardstock -about 5×7” for front and back, with a 1/2” gusset, and a 1-1/2” pocket inside. I cheated and die cut the window from the paper pack, and used a kit for the shaker box (hidden behind the window), that made things super easy!!
The flowers were fussy cut from the paper pack, as I (stupid stupid!!) didn’t purchase the die that goes along with them, and used light blue small pearl stamens for the centers. The bows are cute little ribbon found at a local craft store, and the lacy piece on top is one of HFC dies as well.
Inside I have a couple of interactive pieces, including a card with mini tags, and there is room on the pocket for a treat, like a honey stick, or slip candy bar, as well.
Thanks so much for stopping by & I hope you’ve enjoyed it!!
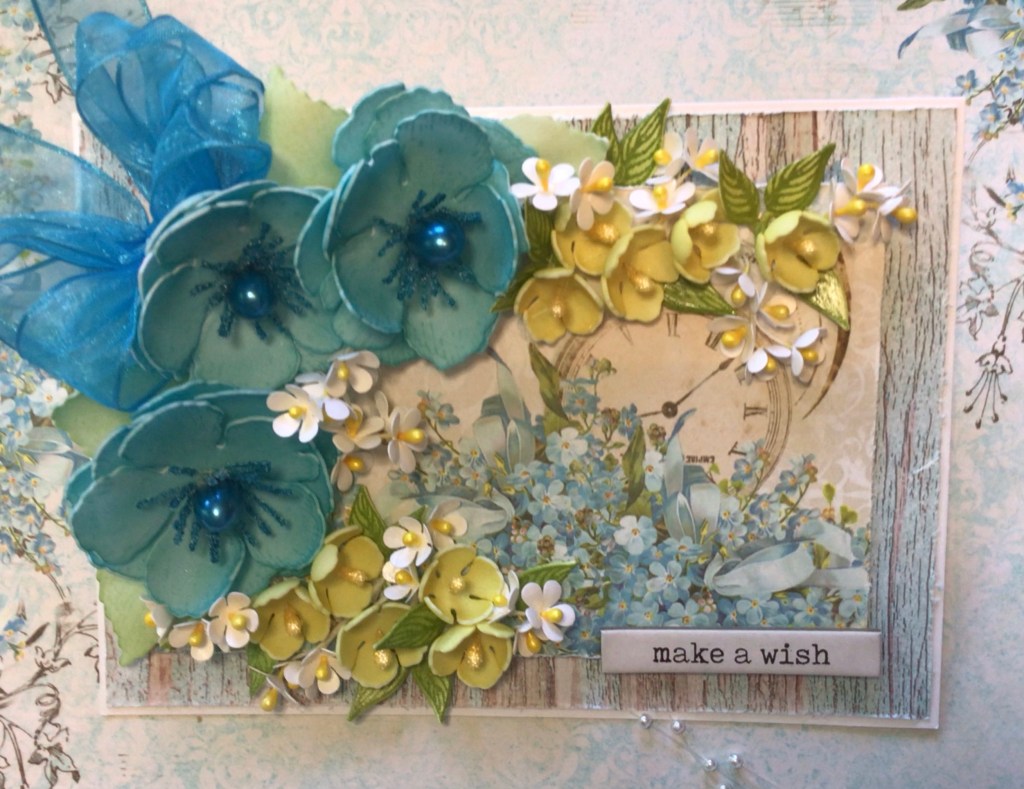
Aqua is one of my favorite colors – and this beautiful paper from Lemon Tree, Forget Me Not just screamed at me to play with it!
This is my first card from this paper, and I had a lot of fun roughing up the edges, and creating some aqua colored wild roses out of fomiron. The gossamer bow isn’t quite the perfect color, but it does seem to bring out the rose centers!
The yellow and blue remind me of Swedens colors (my husband served a mission in Sweden, so I know these things), so perhaps I will save it for him for his birthday…..which is in November!! Probably not! Better come up with a more manly card by then!
I so love this beautiful paper from ScrapandMe, Meadow Impressions, to me it looks like the flowers are kind of like the Purslane (in the Portulaca family) or Moss Rose, which I love! after all I live in Florida, and our flowers must be very hardy to endure July and August! I am sad that I cannot obtain (or at least have not found a vendor for) the type of stamens that I see in my European friends paper flowers, but I do my best with what I have (if any of you have info, please leave me a note!!).
This card is actually an apology card, not a sympathy card, and I didn’t really know how to do the sentiment on the front, so what you see is what you get!
The flowers are made from fomiron, which I’m finally getting used to using, you have to be very careful not to overheat the fomiron, or it will not only curl your petals, but may actually burn your fingers!! I sometimes will cover part of the petal and only curl one side, then come back to it, cover the curled edge with my finger, and reverse curl the other side, hoping to have it look more natural – but I think I might need some really thick gloves to protect myself!
The card base was cut from a Heartfelt Creations die (Gateway Arches) using 110 lb weight paper – much too thick, in my opinion, but I bought the paper, and I will finish using it – but only for square and rectangle bases, I suppose, as it was too too thick to run through my Sizzix machine, and actually kind of curved or bent, the die! I do enjoy heavy paper for making flowers (and HFC has some lovely paper specifically for this purpose) but it is just too thick for most of the things I do.
I have a couple of pearl sprays (Wedding dept at craft store) to add some dimension, and on the inside, I have a cutout placed on a die cut doily.
Thanks so much for stopping by! And please leave me a message, especially if you know where I can purchase cool stamens!
My 2nd or 3rd card from Scrapandme’s lovely Sapphire Days. To be fair, this is modeled after one that Monika Jakubowska did several weeks ago – she used different paper, and colors, but I do have to give her credit for the design.
Once again, using many of my flower (and card) dies from Heartfelt Creations, the light periwinkle blue are made out of Fomiron, but the dark navy blue, and white blossom, are paper.
I did fussy cut the little design inside the card, as well as the sentiment from the paper pack.
Thank you so much for stopping by, and Best Wishes!!
My mom is in love with the color purple – she has a dark, eggplant purple on her front door (really!) lavender in her bedroom, and touches of it all over her house. With all the lovely purple themed paper from ScrapandMe, I thought I should pair one of their paper collections with a purple rose for her card!
I had a lot of fun crafting the rose – even went on-line to find how to do a ombre coloring for a purple rose, and used some “Cactus Flower” ink (using a light touch) for the centers, and gently inked the edges of the petal with actual purple, then I used a blending sponge to blur the colors together.
I love the bling, found at a local craft store, on the left hand side of the card, very eye catching! Inside the card is a cut out, perfect for a note!
One of my newest makes – for a little contest with the Scrapandme paper company (in Poland) – I haven’t been able to obtain the Purple Spring yet, so I had to use their Meadow Impressions – it’s still beautiful!
I’ve developed a new way (for me) of making rose buds, which results in a fat little bud and even works with Fomiron, as seen here. Not that I’m overly pleased with myself or anything, just wanted to share! I also created some dark purple Purselane- at least that is what I was going for! and mini Calla Lilies are tucked in there. I used Rajni Chowlas Crystal Clear sprinkles on one of the butterflies- fussy cut from the paper pack.
Once again, I forgot to post my recent make on WP, but I did manage to put it on FB! (Twice) I must be getting old!! This is a little chocolate box using Graphic 45’s Cottage Life collection.
I used Fomiron to make the flowers and leaves, with exception of the thistle, which were found at a local craft store. I added some glitter to the precut butterfly in the ephemera pack, and the sentiment is one of their stickers.
The inside appears to be a typical card…….
Until you lift the flap, and see the chocolate, and another smaller card, with a sweet message. I’m sorry I do not know the manufacturers of all my dies used for each flower, and the honeycomb – I just got them off Amazon.
And below a short video. Thank you so much for stopping by, please let me know how you like it!
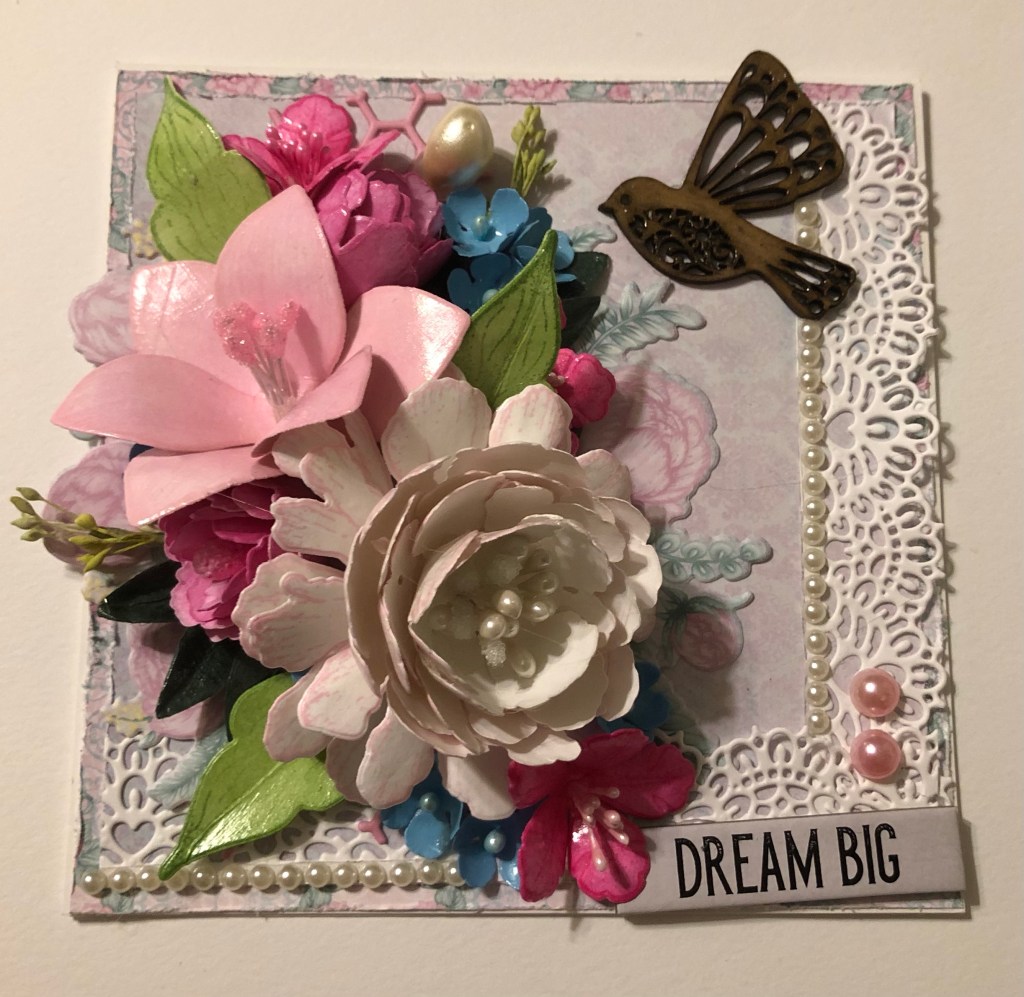
Having fun making peonies lately . . . I needed an excuse to make a white Peony, so I rummaged around my Heartfelt Creations paper packs, and landed on the Floral Banners.
I used the lace from one of their dies, for the pink Lily I actually used the small daffodil die, without the trumpet center, the medium pink are peony “buds” using the small peony dies; the bright pink are the small petunia, and the light blue “blossom” are from the smallest cherry blossom die. So basically 99% HFC products, and a little bit of my time. Can you see the floral “banner” under the dimensional flowers? (Trying to be like the pros there, lol! without the fussy cutting!)
The little bird came from my stash, you’ve probably seen them at craft stores too, I just put some glossy accent on it to make it shine; and the sentiment is from a Tim Holtz package of chipboard sentiments.
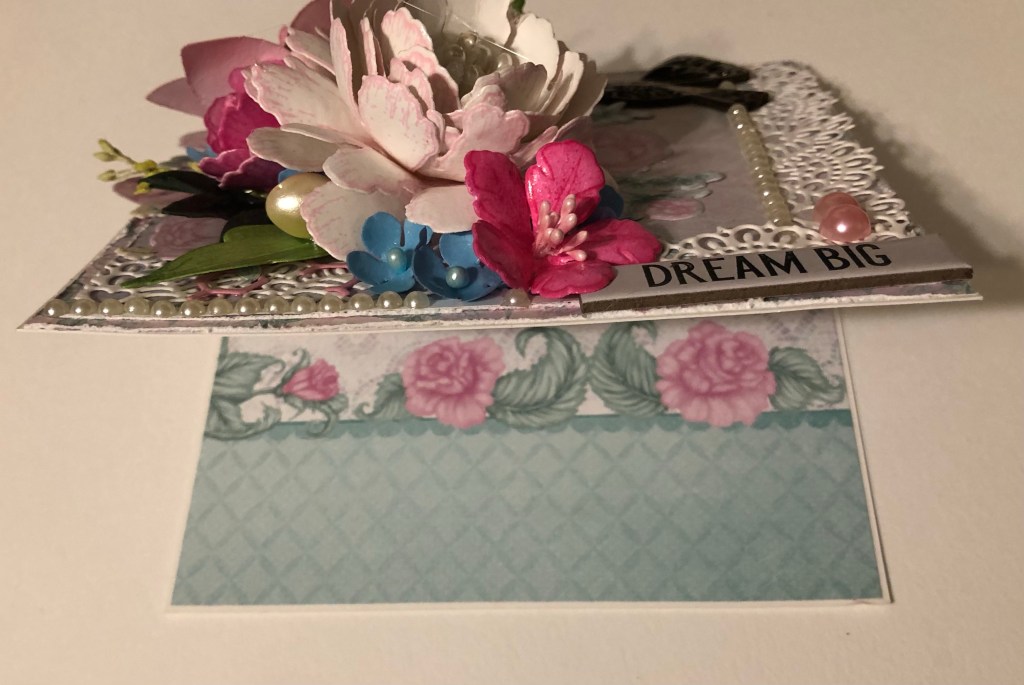
For the middle of the card, I used more of the same HFC paper from the Floral Banners (same sheet of paper throughout, just using the front and the back, and I have a sentiment from a sticker pack you can’t really see in there.
Y’all don’t pay any attention to the fact that the bottom lace is facing the wrong way and should’ve been tucked under the pink paper, ok? It’s a work in progress, and I tried to kind of cover up my mistake with some flatback pearls. It is what it is (sigh)!
A small apology, I haven’t posted very recently, but for a very good reason: my AC went out about 10 days ago – and we live in FLORIDA where there has been a record breaking heatwave – with temperatures in the 100’s, and a heat index of about 110° – I wasn’t in the mood to craft or bake anything! We get the new AC in 2 days, and as it is Sunday morning, and a “cool front” came in yesterday, it only got up to 92°, so the house is a bit more comfortable this morning.
This card is meant for a young ladies birthday, and features a digital image from Connie Fong, who is sponsoring the July 2022 challenge for “A Place to Start” – for which I am on the design team.
This card measures about 9” x 4”, and I selected papers from Ultimate Crafts Bohemian Bouquet, and created a shaker box to bring more attention to the featured image.
So I printed the image out on Bristol paper, and colored it using a mix of my Zig markers and my watercolors pencils. I am NOT a colorist, but I did give it a go; it’s nice to expand my skills into other crafty areas – it wasn’t all that long ago, that I had no idea of how to make a shaker box, and now I make them all the time and find them so fun!
I’m starting off backwards today – this is the inside – sentiments and my handwriting – well, let’s just say, this is better! Clear sheets picked up at Hobby Lobby with lots of sentiments! To be fair, I actually do start off with inside of my cards when creating them, as the front of the card is so dimensional that it can’t lie flat, first I choose my design, cut the card base, and then cut the decorative paper. I glue the inside in first, and place any sentiment or added ephemera to the inside, and if I’m going to stamp the back (you know: “Handmade Especially for You” or something like that!) I’ll do that, then I move onto the front.
Of course I already have in mind what my design is, so I’ll begin working on my flowers, and then any additional touches. This time, as it takes drying time for shaker boxes and flowers alike, I switched back and forth between the two. Then I lay down my ribbon, and painted the sides of my shaker box with white matte acrylic paint.
And here is the front of my card. as you can see, the “ribbon” isn’t actually a ribbon at all, but I love it, and just had to have it!! (Wal-mart find, lol) Sentiment and shaker box kit are both from Creative Expressions, flowers made from Heartfelt Creations dies. The sparkle inside the shaker box came from Buttons Galore.
A little bit more of a close up. Thank you so much for stopping by!