Girlie Birthday Card

A small apology, I haven’t posted very recently, but for a very good reason: my AC went out about 10 days ago – and we live in FLORIDA where there has been a record breaking heatwave – with temperatures in the 100’s, and a heat index of about 110° – I wasn’t in the mood to craft or bake anything! We get the new AC in 2 days, and as it is Sunday morning, and a “cool front” came in yesterday, it only got up to 92°, so the house is a bit more comfortable this morning.

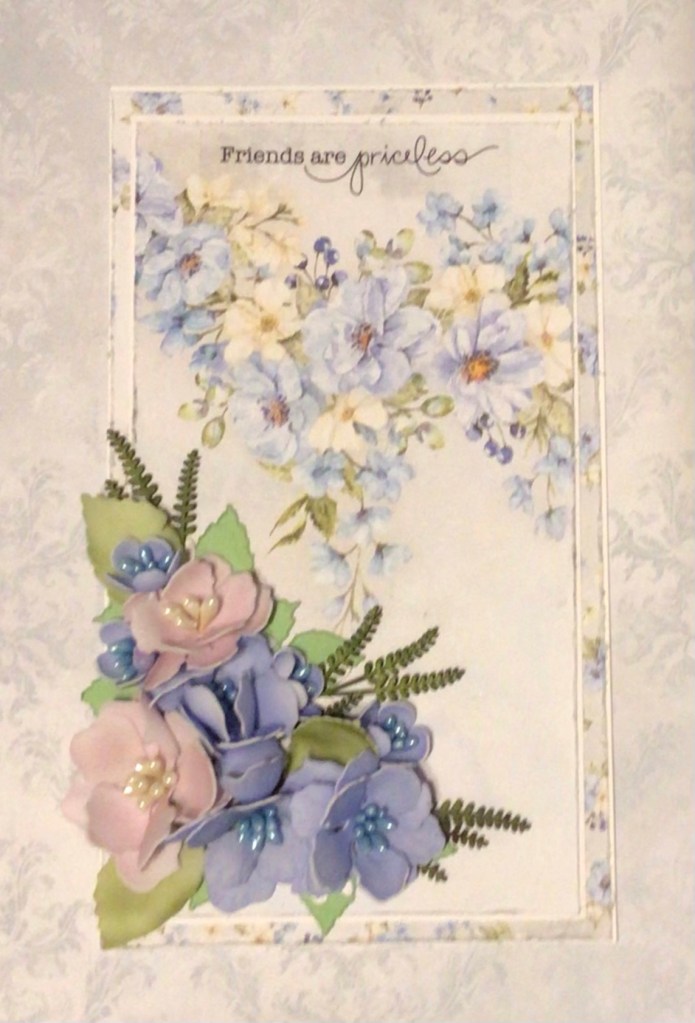
This card is meant for a young ladies birthday, and features a digital image from Connie Fong, who is sponsoring the July 2022 challenge for “A Place to Start” – for which I am on the design team.

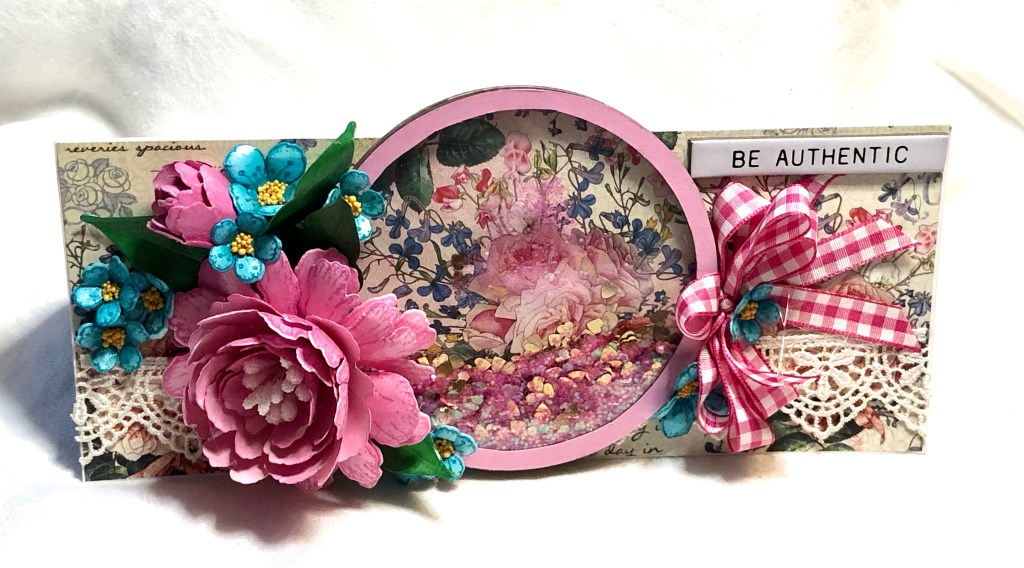
This card measures about 9” x 4”, and I selected papers from Ultimate Crafts Bohemian Bouquet, and created a shaker box to bring more attention to the featured image.

So I printed the image out on Bristol paper, and colored it using a mix of my Zig markers and my watercolors pencils. I am NOT a colorist, but I did give it a go; it’s nice to expand my skills into other crafty areas – it wasn’t all that long ago, that I had no idea of how to make a shaker box, and now I make them all the time and find them so fun!

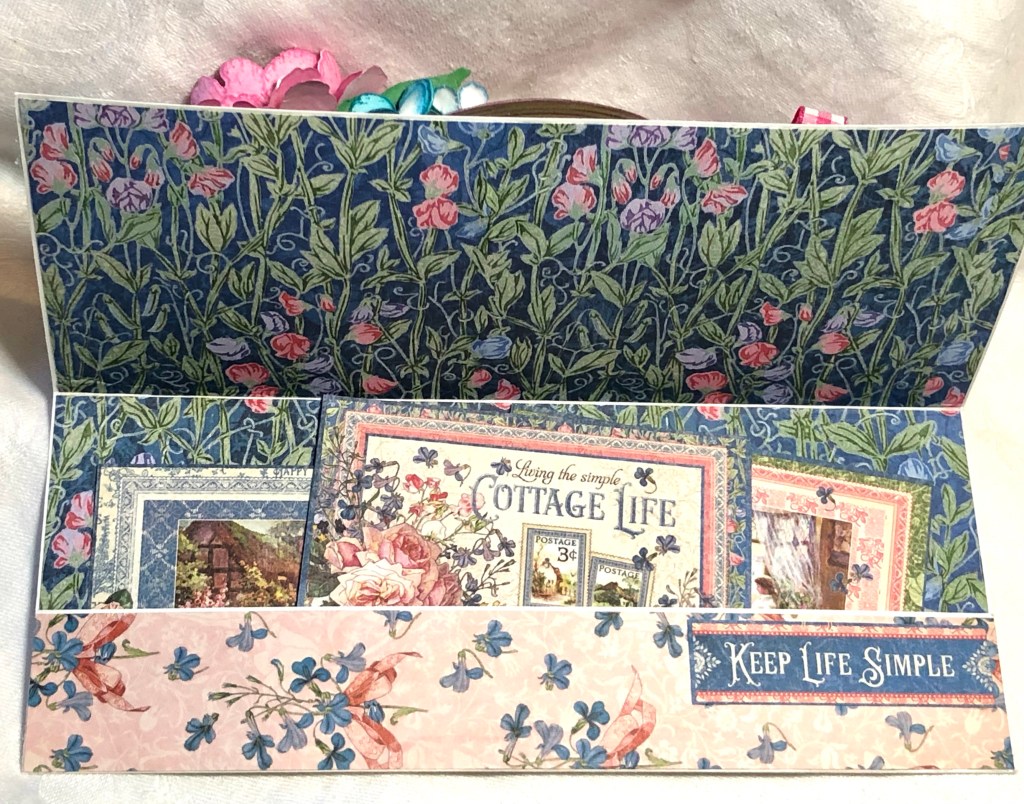
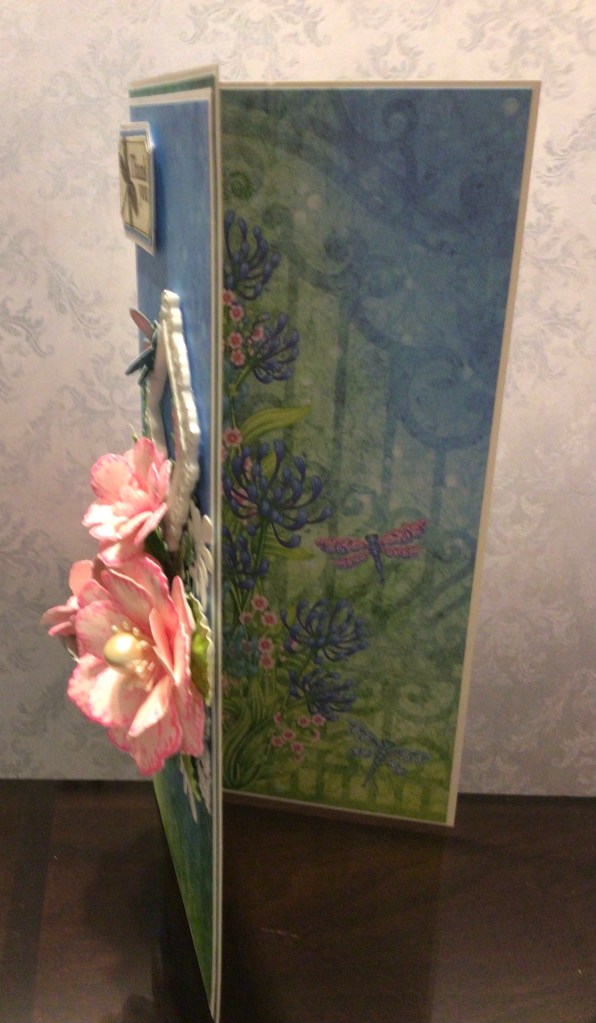
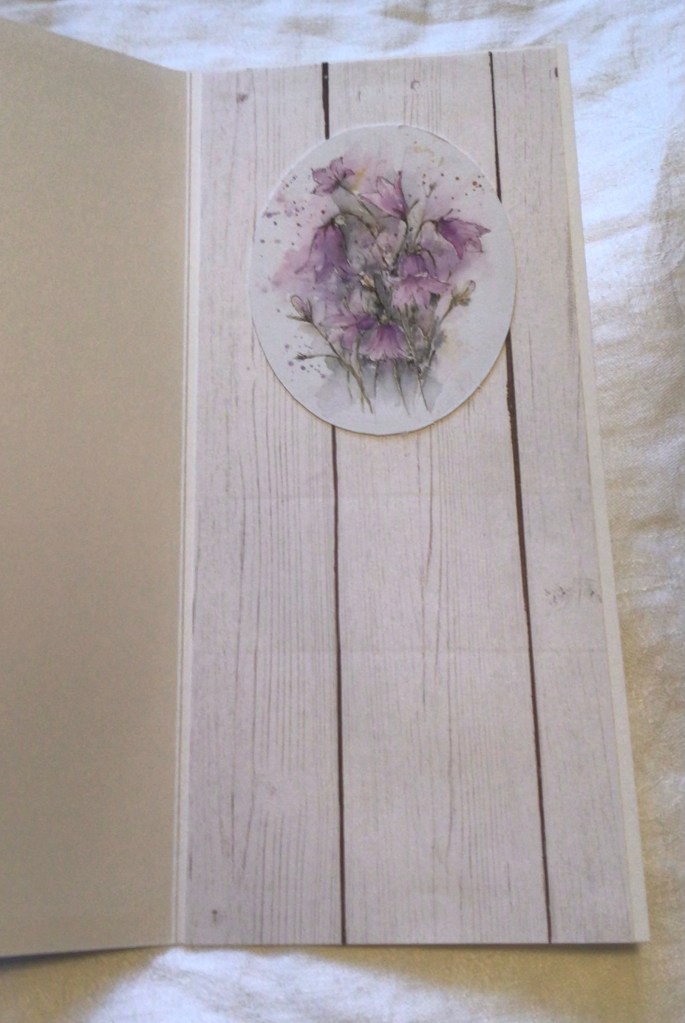
I’m starting off backwards today – this is the inside – sentiments and my handwriting – well, let’s just say, this is better! Clear sheets picked up at Hobby Lobby with lots of sentiments! To be fair, I actually do start off with inside of my cards when creating them, as the front of the card is so dimensional that it can’t lie flat, first I choose my design, cut the card base, and then cut the decorative paper. I glue the inside in first, and place any sentiment or added ephemera to the inside, and if I’m going to stamp the back (you know: “Handmade Especially for You” or something like that!) I’ll do that, then I move onto the front.

Of course I already have in mind what my design is, so I’ll begin working on my flowers, and then any additional touches. This time, as it takes drying time for shaker boxes and flowers alike, I switched back and forth between the two. Then I lay down my ribbon, and painted the sides of my shaker box with white matte acrylic paint.

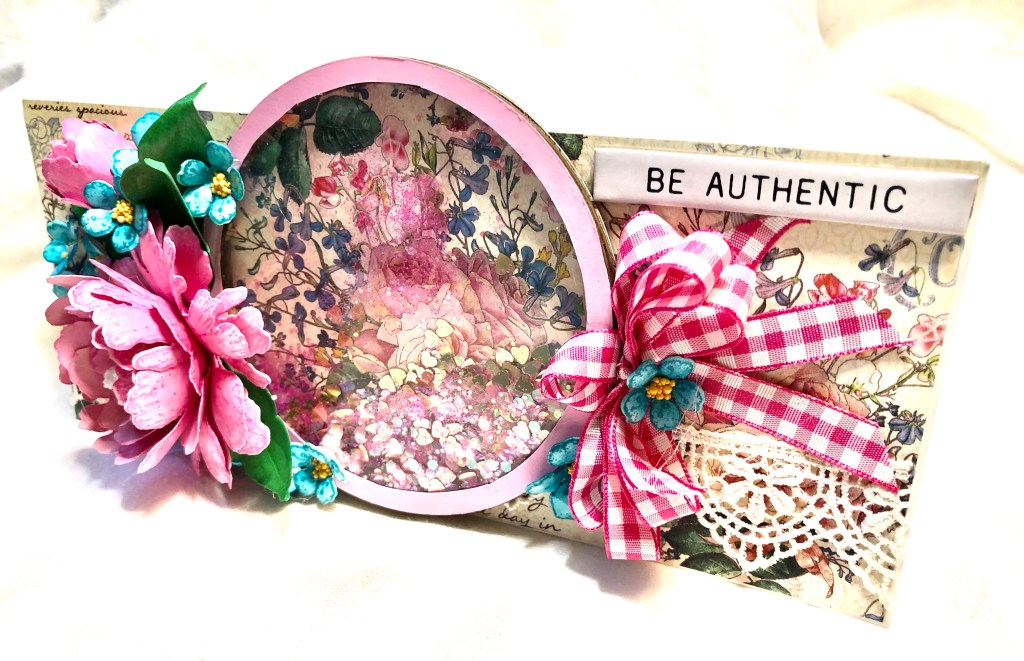
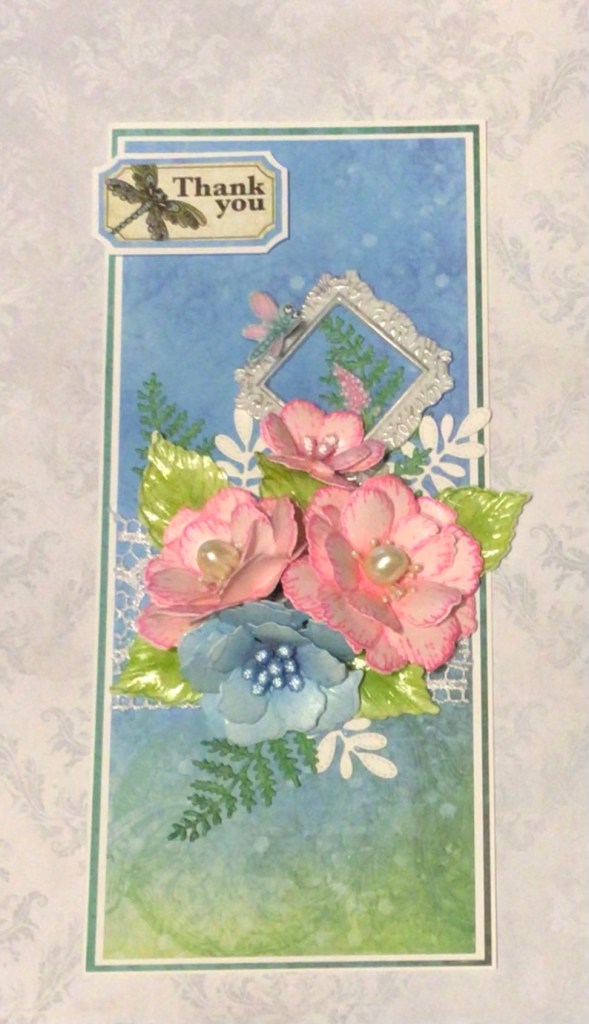
And here is the front of my card. as you can see, the “ribbon” isn’t actually a ribbon at all, but I love it, and just had to have it!! (Wal-mart find, lol) Sentiment and shaker box kit are both from Creative Expressions, flowers made from Heartfelt Creations dies. The sparkle inside the shaker box came from Buttons Galore.

A little bit more of a close up. Thank you so much for stopping by!

Same But Different

My favorite thing: same basic design, but slightly altered in this case, different size cards, different shaped shaker boxes, different paper companies, and of course different flower focus. But the general idea remains the same, and can be duplicated over and over – I guess most things are like that, come to think about it…….two girls (both human) different shaped bodies, different skin tone & hair color, but from the same neighborhood and with similar interests. God must’ve had fun with that, lol! I mean, really, look at all His creations – some are so so similar, but not quite the same, and each different in distinct an beautiful ways! But I’m rhapsodizing!

The first card is using Heartfelt Creations Cherry Blossom Retreat. The shaker box is handmade – meaning no kit, I just cut out multiple ovals, and used clear cardstock under the lattice.

This second card is using Graphic 45’s Cottage Life paper, and it does feature a shaker box, that came from a kit.

I think this card is my favorite of the two, because I just love how the flowers came out!!

Thanks so much for stopping by, and taking a peek at my creations!!

A Simple Wedding Card

This is a very simple card using the swans from Heartfelt Creations Calla Lily collection. I tried to copy one similar to this found on their DT Gallery.

This is part of an inspiration piece for “A Place to Start” card challenge for the month of June (2022) – and the theme is “Down the Aisle”

I used some generic deep pink for the background, and embossed the white overlay and the pink part of the heart. Then I lightly shaded the center of the heart with a pale pink. The heart was also cut out of a shiny gold paper, as were the swans, to add a little glitz. The sentiment I just typed and printed off my computer, backed it with some gold as well. The whole thing probably took less than an hour from start to finish!

Thanks for stopping by, and for considering our <a href="http://<a href=https://hereisaplacetostart.blogspot.com> A Place To Start challenge.

Priceless Friendship card

This lovely uses Scrapandme Sapphire Days paper, it is about 4-1/2” x 7-1/2”. The flowers are (Heartfelt Creations dies) cut out of fomiron, and the fern are actually thin little woodcuts, which I found from Little Birdie Crafts – they are primed when you receive them, and I just daubed them with a little ink.

This is the inside of my card. I used the same sheet of paper that I had on the front, and just fussy cut he flowers out, and turned them lengthwise. Every time I do fussy cutting I marvel at people who claim to love it – what I love is die cutting! And electric die cutting machines like my Vagabond II, are the bomb!

Teaching myself how to heat the fomiron so that it does what I want it to, without burning me little fingers has quite a learning curve! I’m waiting with baited breath for some colored fomiron to come in the mail….it just adds such a nice, soft touch, but it is a little bit fiddly!

For the sentiments, I cheated and found a sticker pack from Hobby Lobby – I actually have about 5 of them – some are religious, some family oriented, some friendship – and their handwriting is much neater than mine!

Thank you so much for stopping by, and please give me. Humans up, or a note, if you like my work!

Dragonfly Dreams

This paper from Heartfelt Creations is delightfully decorated, in some of my favorite colors. It is rather whimsical, and I purchased it specifically with my grandchildren in mind. They will love the fanciful dragonflies!

As for myself, it is the solid sheets that are most appealing as a backdrop for the lovely flowers I can create from the Heartfelt Creations flower dies! I tucked a piece of lace beneath the flowers. I took a very old sentiment cut out (from some cute frog paper HFC put out many years ago, and was in my stash) that happened to have a Dragonfly on it – I just had to use it – even if it doesn’t match perfectly.

For the inside, simply a piece from the paper pack, just delightful. Thank you so much for stopping by.

All the Best – Sapphire Days

I love this lovely blue paper from Scrapandme papers! Personally, in retrospect, I should have made the flowers a bit more pale, but they are close to the same shade.

I almost always use flower stamps and dies from Heartfelt Creations, and these are called the Sweet Magnolia. The arched gateway die is one of my favorite shapes for cards. I used the edge from one of the papers for the middle part, and tucked the magnolias around the corner. Don’t you love the fancy stamens? I think they call them “rock candy” stamens.

The inside panel uses a paper from another Scrapandme collection (Aquarelles), and a cut-out from the Sapphire Days paper, using a very old “Creative Memories” circle cutter. There is plenty of room to write a sweet Mothers Day message below.

I really am loving these beautiful papers from Poland, and (again) am just so excited to have found a shop in the US that carries them! I am entering this in the Challenge # 92 – For Mom, from the Scrapandme blog.

Thanks for stopping by!

Springtime and Climbing Clematis

I wish I lived somewhere Clematis would grow! I think it needs much cooler weather than Florida. I’m entering this in the Four Seasons Spring challenge for May.

I love this pretty image from the Heartfelt Creations Climbing Clematis collections. There is a lot of cutting and pasting going on here, tho!

I took one of their card panels, and cut out the center image, then went to a different page, and cut the same size circle of the fence. I glued that where the original picture was. Then I die cut the birdies and the birdhouse straight from the paper pack (can you say time saver!!) popped up the birdhouse with foam tape, as well as the little birdie on top of the fence post.

I used one of their large square dies to get the lace overlay, stamped, colored, shaped (yada yada) the clematis and used hot glue to adhere, I also used a dollop of hot glue -waited 5 seconds, and then put the other little birdie on. The white pearl things are from the bridal section of a local craft store.

The inside is a couple of leftovers – the arch from the same collection, and the pink lacy door, from the Gateway dies. No sentiment, as this is one of the 100 cards I gift to a local nursing home – so the nurses will write something sweet for their residents.

Thanks so much for stopping by!

Piano Shaped Thank-You Card

I found this delightful template for a piano shaped card on Split Coast Stampers, and the minute I saw it, I knew I had to make this for a certain someone who goes to Church with me (our organist!).

It was delightfully easy, I just fussy cut the piano out, and then I covered it up with flowers I’ve made from Heartfelt Creations – because those are the only flowers I make, lol!!

On the side, where the support is, there is a sentiment, I chose “Thank You” because: a) it fit, and b) she does so much for us! You could also put a different sentiment, but perhaps in a different location, like just above the keyboard.

If you simply fussy cut what I call “flat flowers”, you see that with the hinge down, you could slip this baby into an envelope for snail mail (but alas, I could never do that!)

Thanks for lookin’!

Lilies and Lace v.2

Well I am hooked on the idea of Lilies and Lace! Actually, I’m just hooked on these Scrapandme papers I’ve discovered!! This lovely card is also from the “Aquarelles” collection.

To make this card, I used the largest die from the Heartfelt Creations Teardrop Lattice Gateway dies, to make the shaped card. Then I cut the front panel with the same die, adhered it in place, cut the teardrop lattice gateway, and adhered it on top of the Scrapandme decorative paper. The inside panel was cut using the largest of the Heartfelt Creations Scalloped border gateway die for the right hand side, and for the left hand side, I cut this image first using my old Creative Memories circle cutter, and then used the largest scalloped circle die from inside Heartfelt Creations Decorative Circle Frames die set, to place behind the patterned paper – although both pieces came from the same paper pack as everything else.

On the front of the card, I took some fabric lace and glued it down, and then placed a ribbon in the center as shown – and I clamped it for quite a while before going back to decorate with the flowers, to make sure it had dried. In fact I made all my flowers after I glued the lace and ribbon down.

For the lilies, I actually used the HFC Daffodil, and narrowed the petals a smidgen, and then put in the lovely sparkly stem you see there – I did roll the wire of the stamen in some matching ink. The daffodil, again, was made from the same set. The small blossom were cut from the smallest Classic rose dies, and I just cupped the flowers, and glued in the stamens. The ferns are from a “no name” set, and I used the HFC Dahlia large leaves to tuck under the lilies.

I think even the “Thank you” sentiment came from HFC, probably the Butterfly Dreams set – its in the one with the lacy square, and small doily, as well as the Single smaller butterfly. I’m not sure this set is available anymore, but I find lots of great sentiments for die cutting from Creative Expressions on-line at various shops – Heartfelt Creations and Graphic 45 often have sentiments in their collections as well, whether stamps, or die cuts.

And that will finish your card! I do love creating these cards, but even more, I enjoy giving them to people. Mothers Day is coming up, and I have over 50, which I will be taking over on the Saturday before, so the nurses can sign and deliver them. Wouldn’t it be great it I could make 75 next year?……that’s a lot of crafting!!

Well, thanks for stopping by, and please leave me some feedback, and share my blog to others who might be interested!

Lilies and Lace

The theme at “A Place to Start” for May is Lilies and Lace. I love the beautiful artwork on Scrapandme papers! I had thought I would never get to use them, since they seem to be based in Poland, but got lucky, and found a shop in S.Carolina (Crafty City) that had a few of their collections. So this is my very first Scrapandme Card!

This card uses the Aquarelles paper collection, and of course, my favorite flower die company Heartfelt Creations for my hand crafted lilies and blossom. I sort of cheated, and used the dies for the daffodil, narrowed the petals a bit, and then used the leaves from the dahlia collection. (The fern leaves are from an unknown designer.)

I just love stamens that I used for the centers, don’t you? I had to hand die the purple ones, I had completely run out, but the ones I had were very pastel anyway, so (believe it or not!) I used the teal ones, and died them to purple you see here. The lace is from my stash, and I literally have only about six inches left of it!!

The inside was cut from the paper pack as well as the sentiment, using an old oval cutting device I have had for years made by Creative Memories.

Thanks for stopping by, and please leave me some feedback!!