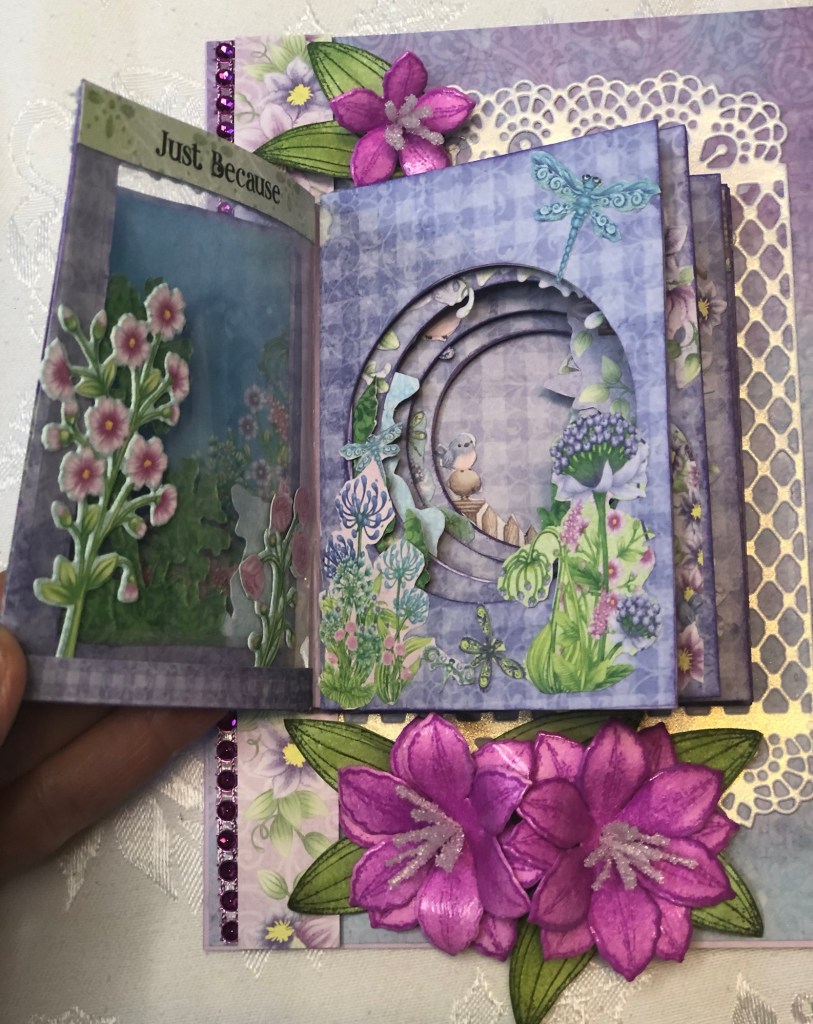
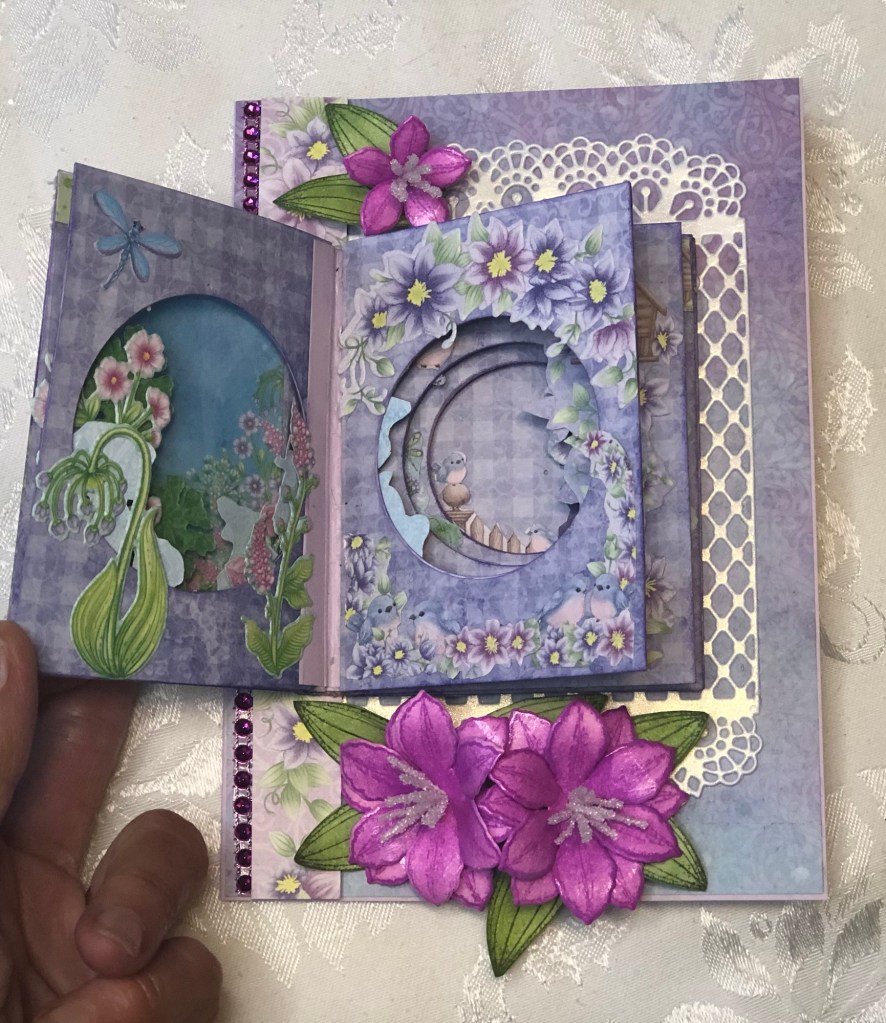
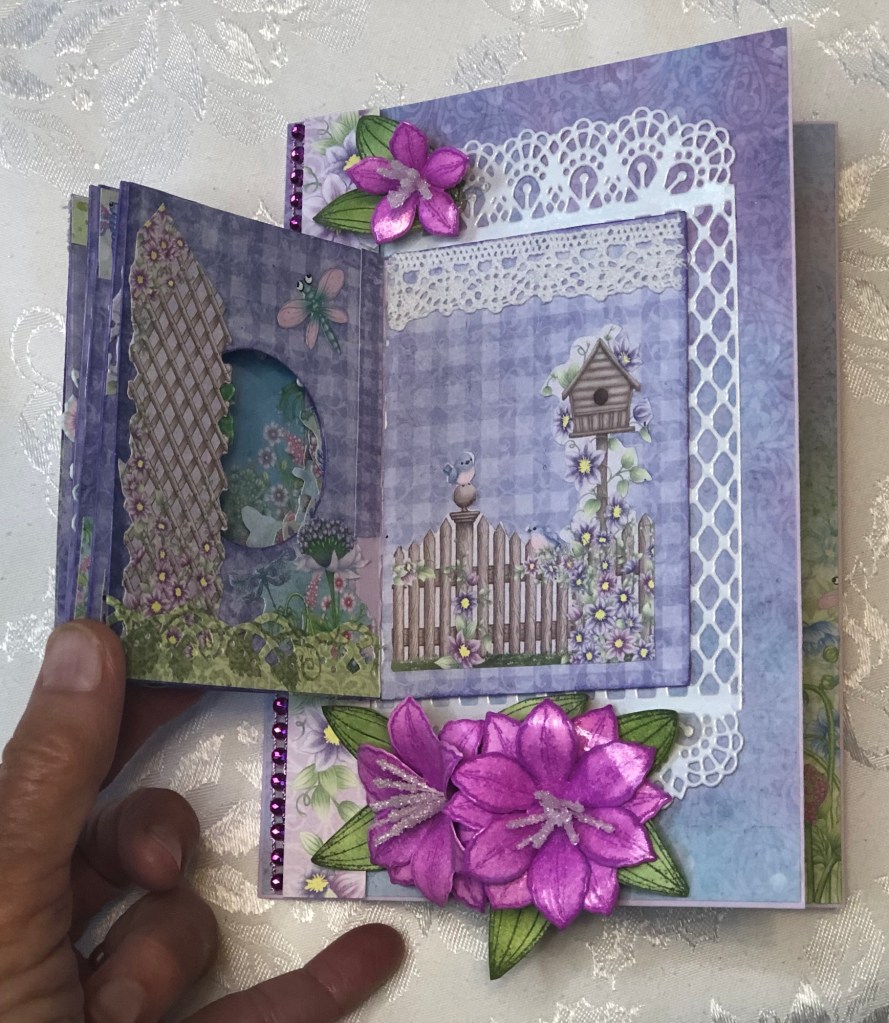
This is my third tunnel album. I’m actually posting out of order, as I told someone I’d get this one up today!
This mini is a little bit bigger than my previous, at 2-1/2 x 3-3/4” inches, because some of the images were quite a bit bigger than I could use in the smaller booklet. I also made quite a few mistakes putting it together, but I was plenty stubborn, and determined to make it work!
I used two paper collections, the clematis and the Dragonflies, and was lucky in that I was also able to use several die cuts to get my images instead of fussy cutting everything! (I’m not a big fan of fussy cutting). Anyway it was really a fun (and distracting) project that turned out rather well, I think!
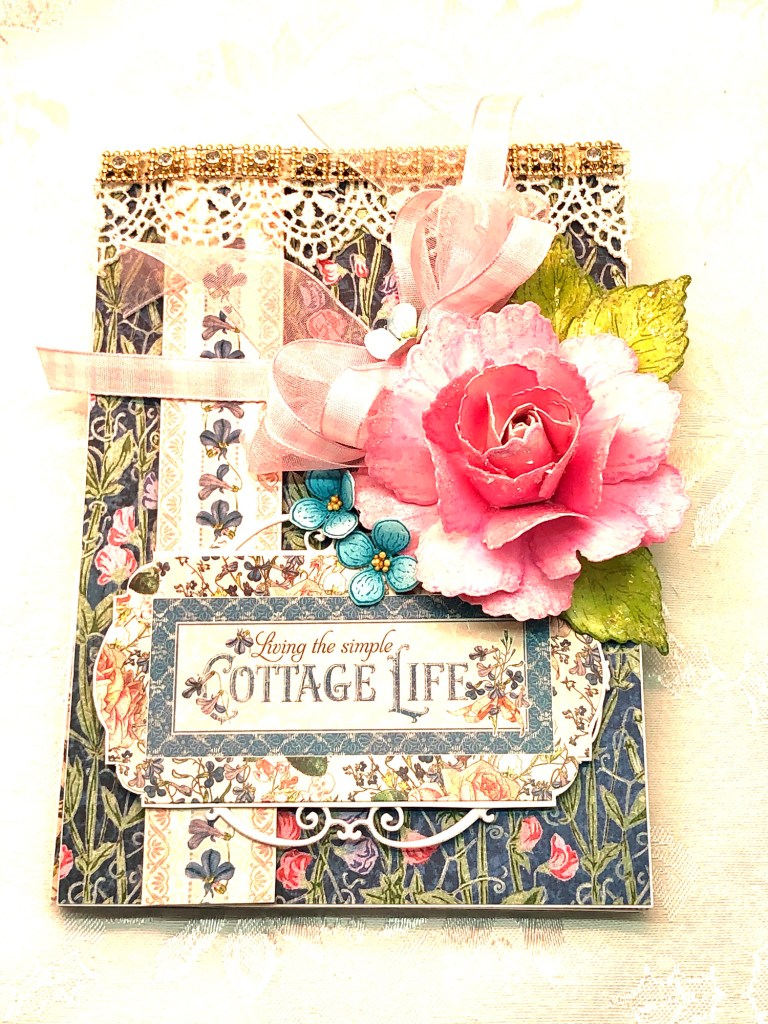
I was rummaging around upstairs and found this lovely paper from last year. Graphic 45’s “Cottage Life” collection – I have quite a lot of it, not sure how it got hidden away!
I also happened upon this pink floribunda rose that I thought would set it off beautifully. I used the Heartfelt Creations large Wild Rose die, and added a bit of glitter to the edges of the petals, and leaves. Too fun! ( Glitter is my middle name, lol!) I tucked a couple of spare hydrangeas around it, and added a gussied up bow too.
I found a little oval die cut in my stash that I used behind the statement in front; it’s amazing, really, how much stuff I used from my stash in this little card! Even inside – I had found 3 honey sticks given to me by a friend, so I added a little extra glue on the inside pocket to keep it from sliding (making a very narrow pocket especially for the honey stick) and put a little flag on top of one to catch the eye.
And voila! A pretty card in just a couple of hours!
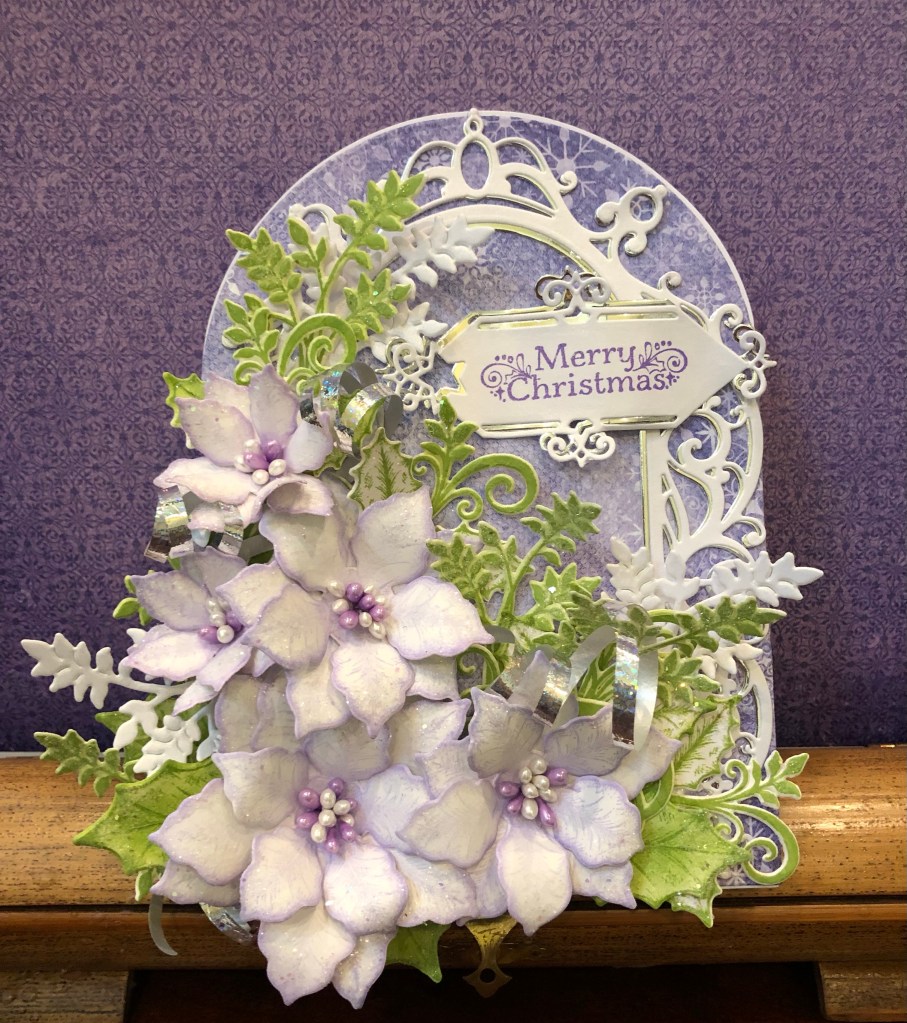
This lovely card is a copy of one I saw on the Heartfelt Creations website a few months ago. This uses the Hollyhock Garden flowers and papers, and the Palace Garden die. Don’t you just love the shaped cards?
The sentiment here is from HFC Elegant Rose Frames – I cut it out 2-3 times to give it a bit more dimension.
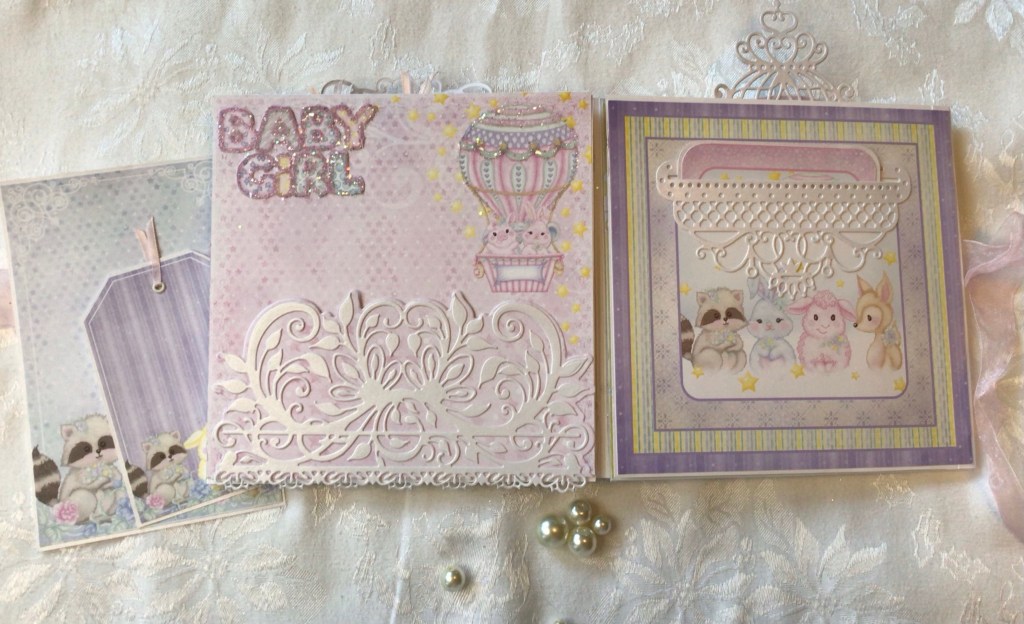
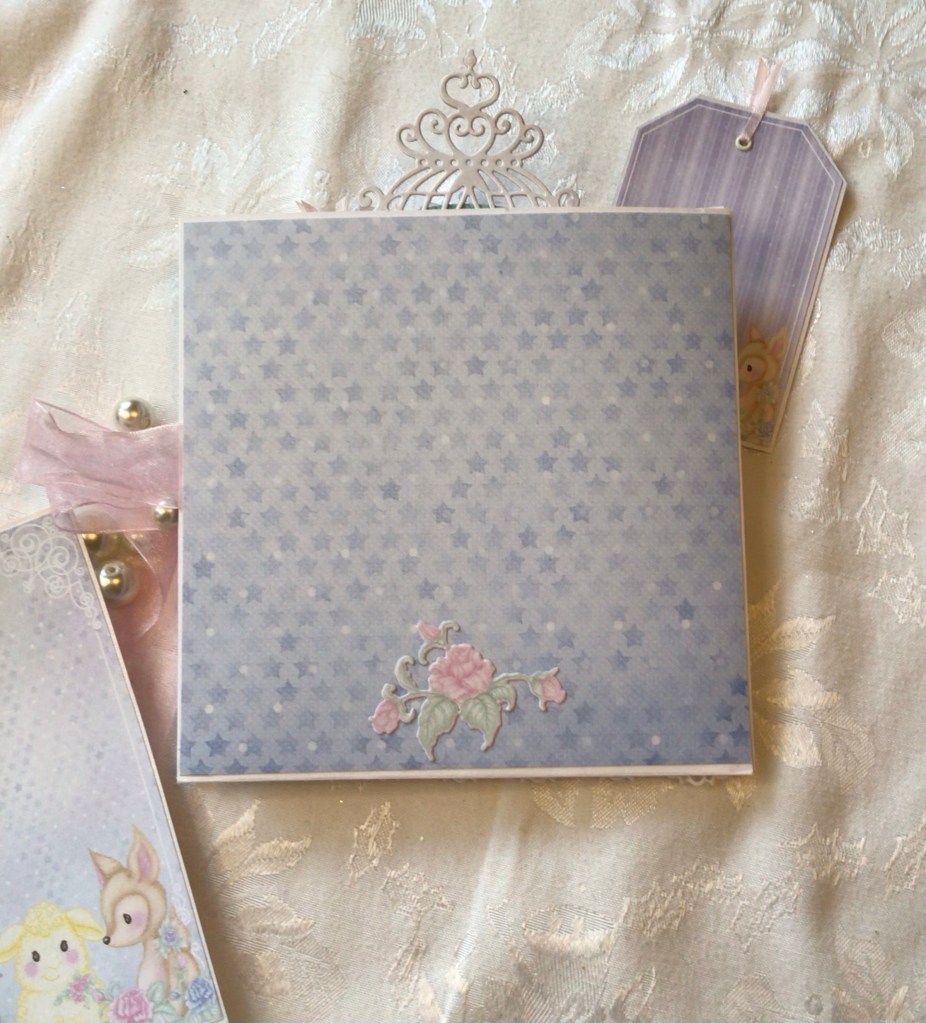
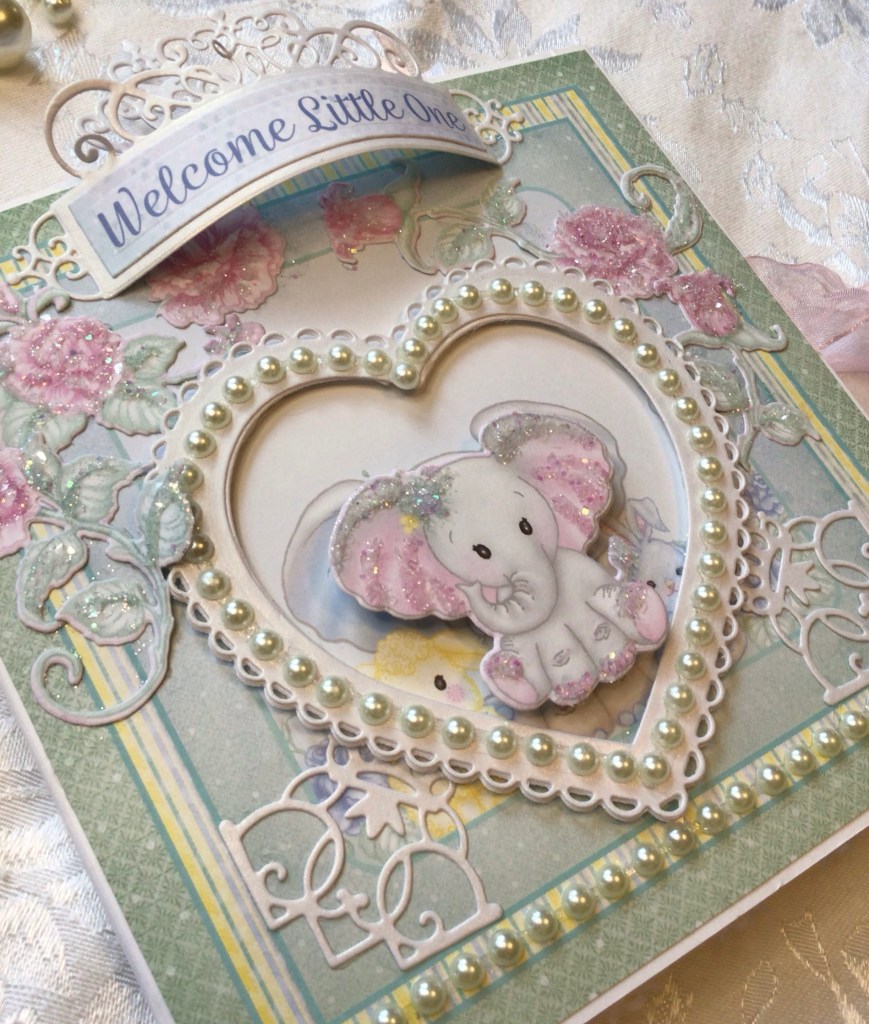
A friend of mine from the pool was delighted to welcome her very first grandbaby on July 2, apparently they had thought this was never to be, so an especially welcome surprise for the entire family!
I copied the idea for this sweet album from Nikki Craft, and of course modified it as I went along. This uses the Heartfelt Creations Tender Moments collection – the baby animals are so darn cute!! I have page by page the entire album, but if you’re in a hurry, skip to the bottom for a little video walk through.
I’m having trouble deciding which of these two cards I like best! Can’t decide which one looks better – I love the silver ribbon, but the flowers seem too big on the second one – on the first one I like the flower placement, but seems like the colors don’t match up just right. In any case – I have completely used up this paper pack – 35 cards, mostly rather embellished. Anyway, please help me pick – it’s for a VIP!
Below is the inside of the first card – both are practically the same.
This is the second card – you can see subtle differences.
And of course, a couple of closeups of the flowers from each card:
Thanks for stopping by, and truly, I need your help on deciding which one to give!!
The problem with my Christmas card production is my love for embellished cards, with lots of florals. I tell myself, “just 2-3 cards a day, simple, flat, easy to mail” and what do I end up with? Big fat cards that need to be hand delivered, that’s what! but I am in love with this latest one. I started out rummaging through one of my drawers looking for something, inspiration, I suppose. Anyway, I found some old card bases, and thought maybe I could play around with it, so I had to rummage some more, and found some dies that were designed to go with these type of card bases.
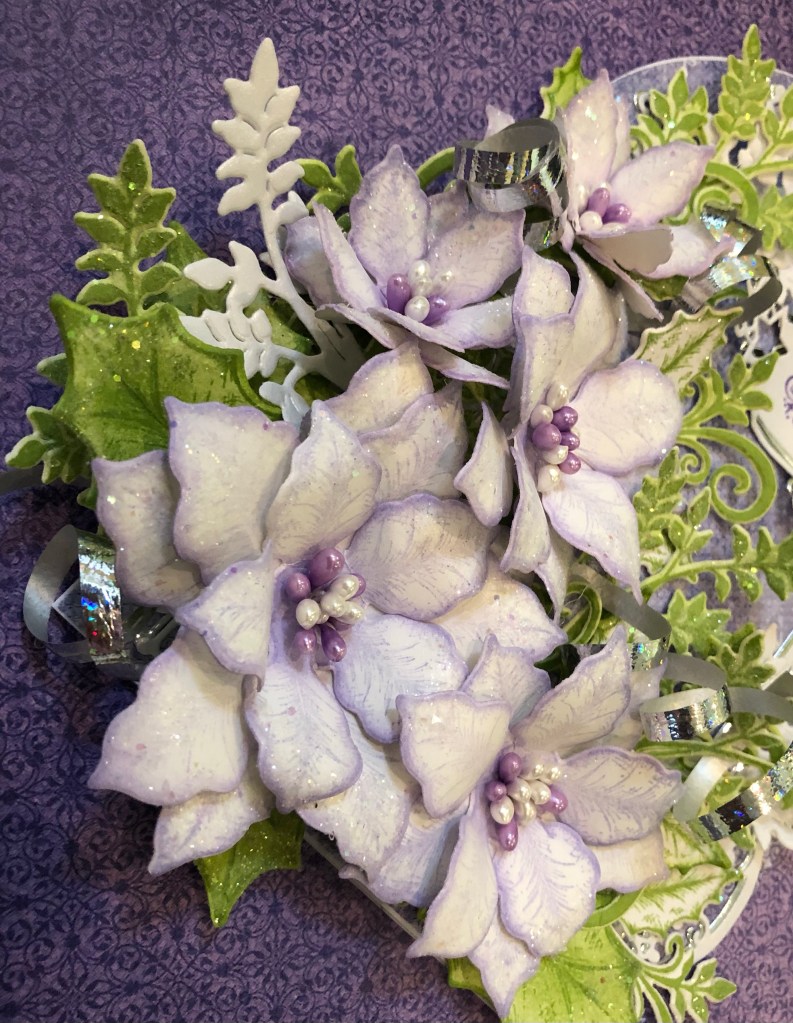
For this card, I used Heartfelt Creations Holiday Star paper, and one of the 6”x6” shutter fold cards, as well as the small Festive Poinsettia stamp and die set.
Here is a close up of the flowers
I did something a little different, at the bend of the shutters, I threaded in an organza ribbon to tie it together, and I used some little Velcro dots to keep the shutter flaps together (now that I think about it, I guess I could have glued them together). Then I just started fiddling around with flowers – decided to stamp these in lavender to go with the paper color – and hot glued them down. I have a little video below of the full card.
I think it turned out pretty good, and I really like it! I hope you do too. Thanks for stopping by, and please leave me a comment sometime!
It seems like everyone is focusing on Christmas Cards right now (late August) – but I am not in the mood. Yet. I have ordered some paper, and have been drooling over the idea of some star shaped shaker boxes, but for now, it is HOT outside, in the mid 90’s in Florida, and I’m not quite ready to give summer up.
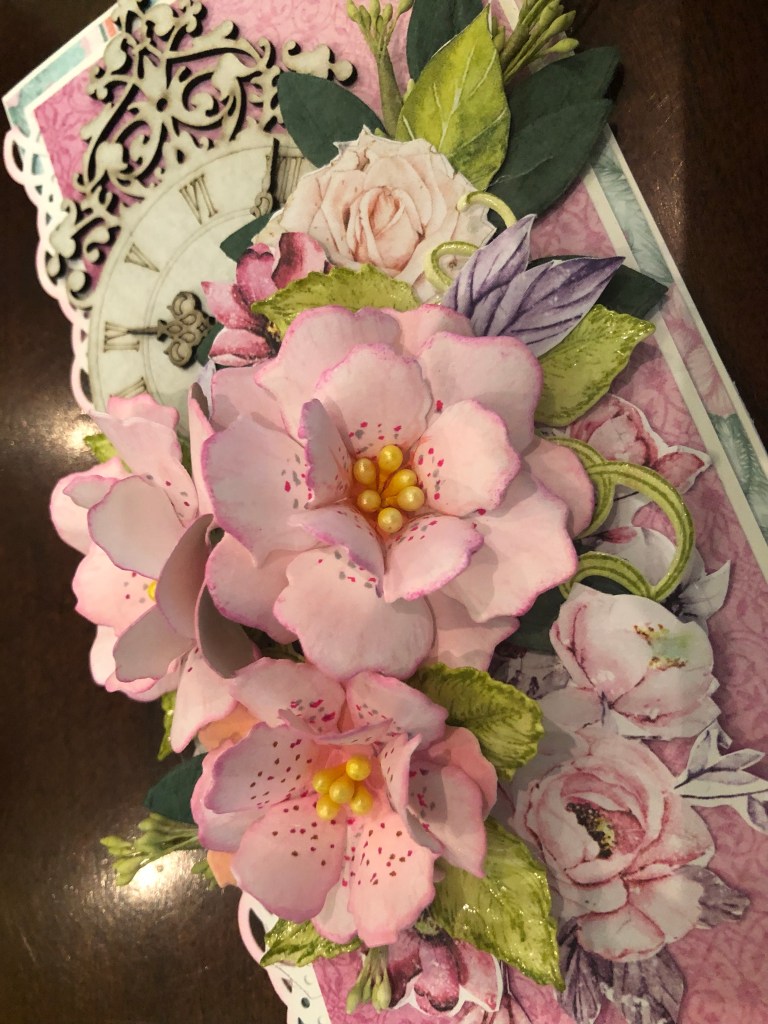
I’ve been playing with my flowers, and being frustrated at not being able to obtain some of the very, very fancy flower stamens that I see on others cards, I have decided to improvise. Additionally, I have added some fussy cuts to lay under my dimensional flowers, to hopefully enhance the look.
I’ve used paper from the Heartfelt Creations “Floral Borders” collection, and my flowers are from HFC Classic Rose – although I didn’t exactly fashion them like a classic rose, did I? The little lacy edge is a paper punch from Martha Stewart that is probably 15 years old, and not available anymore.
The little woodchip clock is adorable – too bad some of it had to be covered up! I ordered this (probably) from Little Birdie Crafts a while ago, when they were having a sale on a lot of chippy elements – the sentiment is also from them – I just tapped it lightly with a little pink dye to help it blend in better.
Here is a little close up of one of the flowers – since I couldn’t find the fancy stamens, I added some dots to the petals by hand in pink and brown – it kind of looks like something you’d find on a Tiger Lily or an Orchid, doesn’t it? Anyway, its amazing what a 5 minute detail can add to the look of something.
Another close look at the flowers, I’m very pleased with how it turned out, and although the fussy cut flowers (from Mintay’s Graceful papers) don’t match exactly, they do have the same color scheme & add to the dimension.
Thanks so much for stopping by! (Comments always appreciated!!)
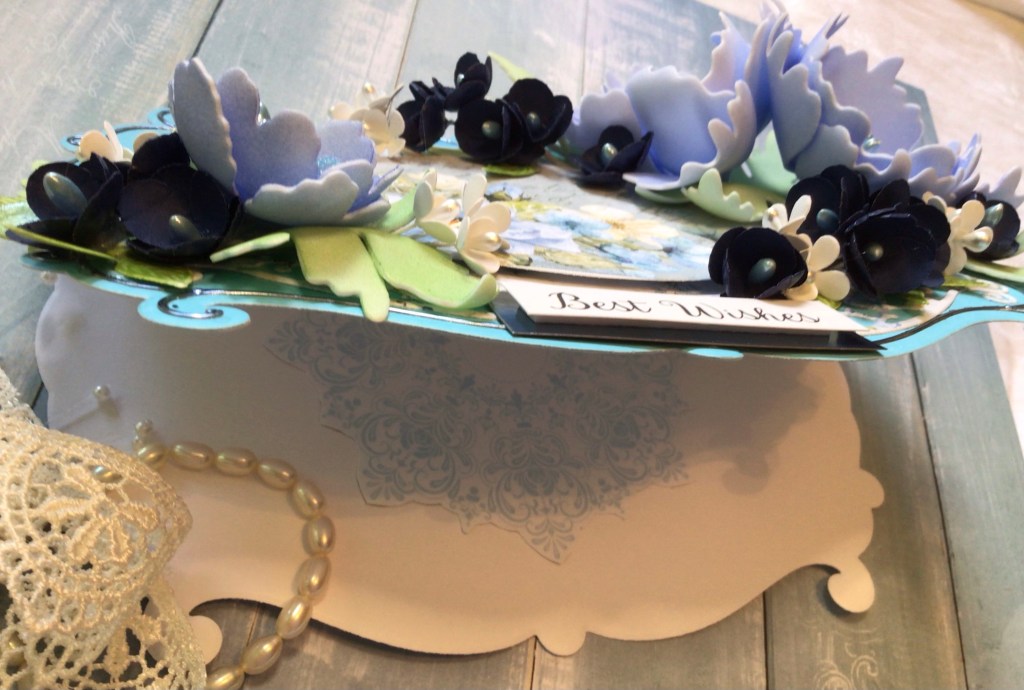
My 2nd or 3rd card from Scrapandme’s lovely Sapphire Days. To be fair, this is modeled after one that Monika Jakubowska did several weeks ago – she used different paper, and colors, but I do have to give her credit for the design.
Once again, using many of my flower (and card) dies from Heartfelt Creations, the light periwinkle blue are made out of Fomiron, but the dark navy blue, and white blossom, are paper.
I did fussy cut the little design inside the card, as well as the sentiment from the paper pack.
Thank you so much for stopping by, and Best Wishes!!
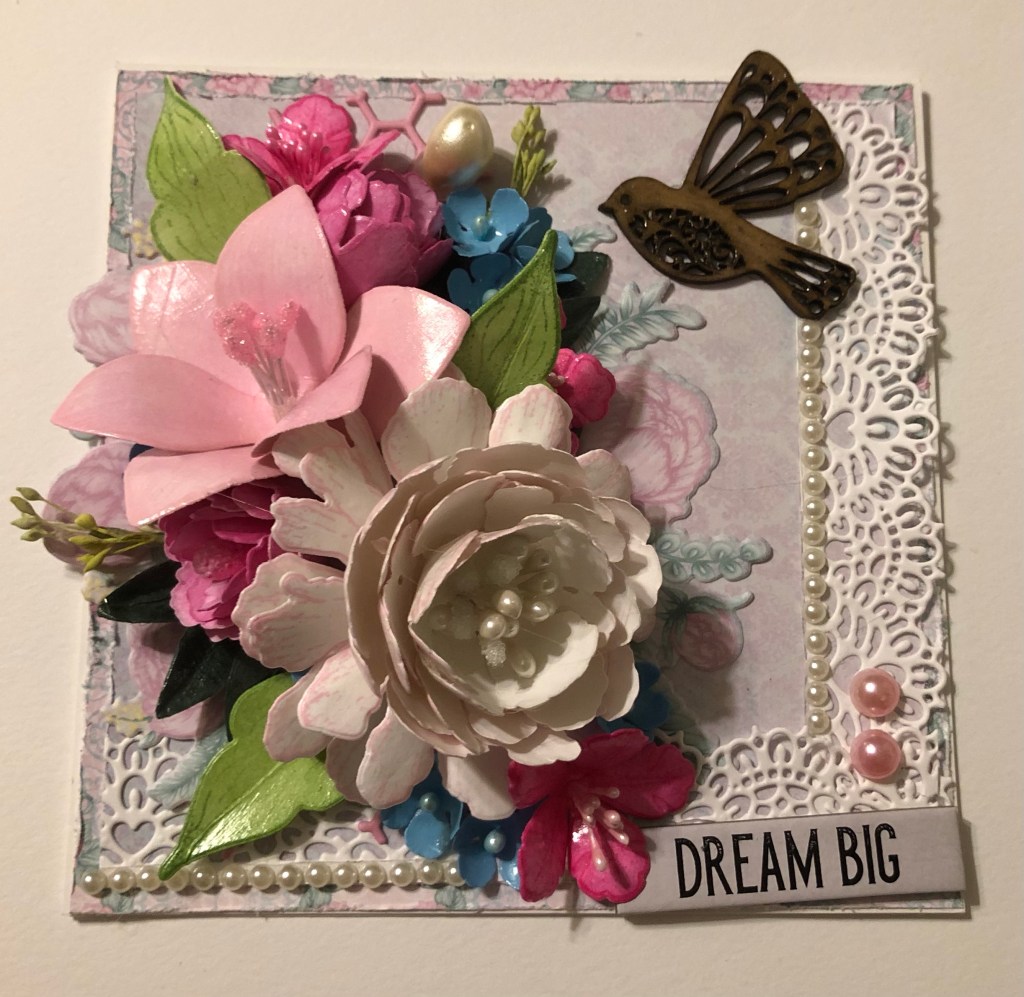
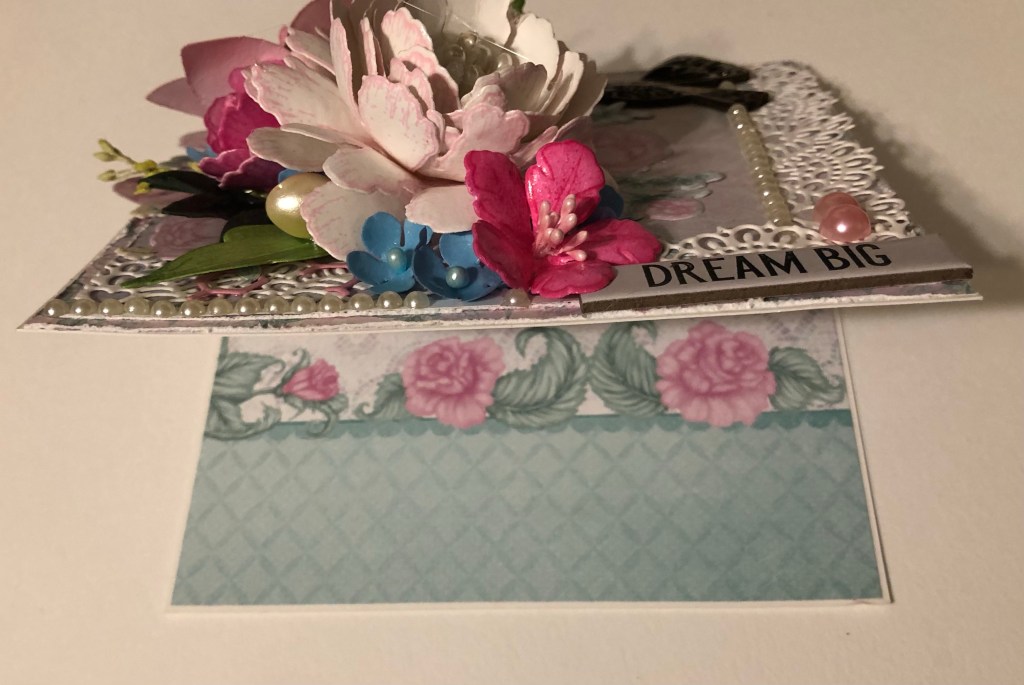
Having fun making peonies lately . . . I needed an excuse to make a white Peony, so I rummaged around my Heartfelt Creations paper packs, and landed on the Floral Banners.
I used the lace from one of their dies, for the pink Lily I actually used the small daffodil die, without the trumpet center, the medium pink are peony “buds” using the small peony dies; the bright pink are the small petunia, and the light blue “blossom” are from the smallest cherry blossom die. So basically 99% HFC products, and a little bit of my time. Can you see the floral “banner” under the dimensional flowers? (Trying to be like the pros there, lol! without the fussy cutting!)
The little bird came from my stash, you’ve probably seen them at craft stores too, I just put some glossy accent on it to make it shine; and the sentiment is from a Tim Holtz package of chipboard sentiments.
For the middle of the card, I used more of the same HFC paper from the Floral Banners (same sheet of paper throughout, just using the front and the back, and I have a sentiment from a sticker pack you can’t really see in there.
Y’all don’t pay any attention to the fact that the bottom lace is facing the wrong way and should’ve been tucked under the pink paper, ok? It’s a work in progress, and I tried to kind of cover up my mistake with some flatback pearls. It is what it is (sigh)!
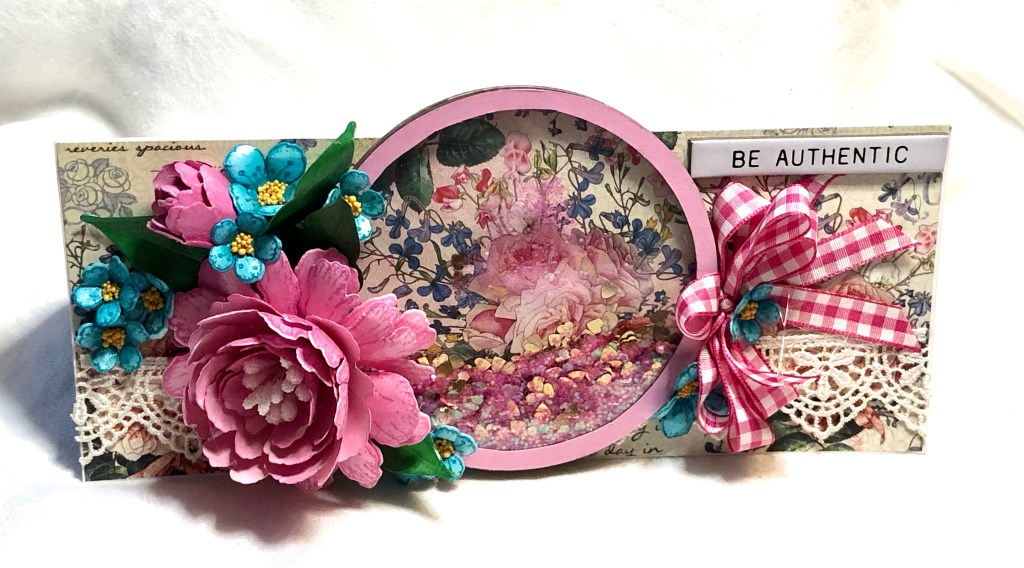
My favorite thing: same basic design, but slightly altered in this case, different size cards, different shaped shaker boxes, different paper companies, and of course different flower focus. But the general idea remains the same, and can be duplicated over and over – I guess most things are like that, come to think about it…….two girls (both human) different shaped bodies, different skin tone & hair color, but from the same neighborhood and with similar interests. God must’ve had fun with that, lol! I mean, really, look at all His creations – some are so so similar, but not quite the same, and each different in distinct an beautiful ways! But I’m rhapsodizing!
The first card is using Heartfelt Creations Cherry Blossom Retreat. The shaker box is handmade – meaning no kit, I just cut out multiple ovals, and used clear cardstock under the lattice.
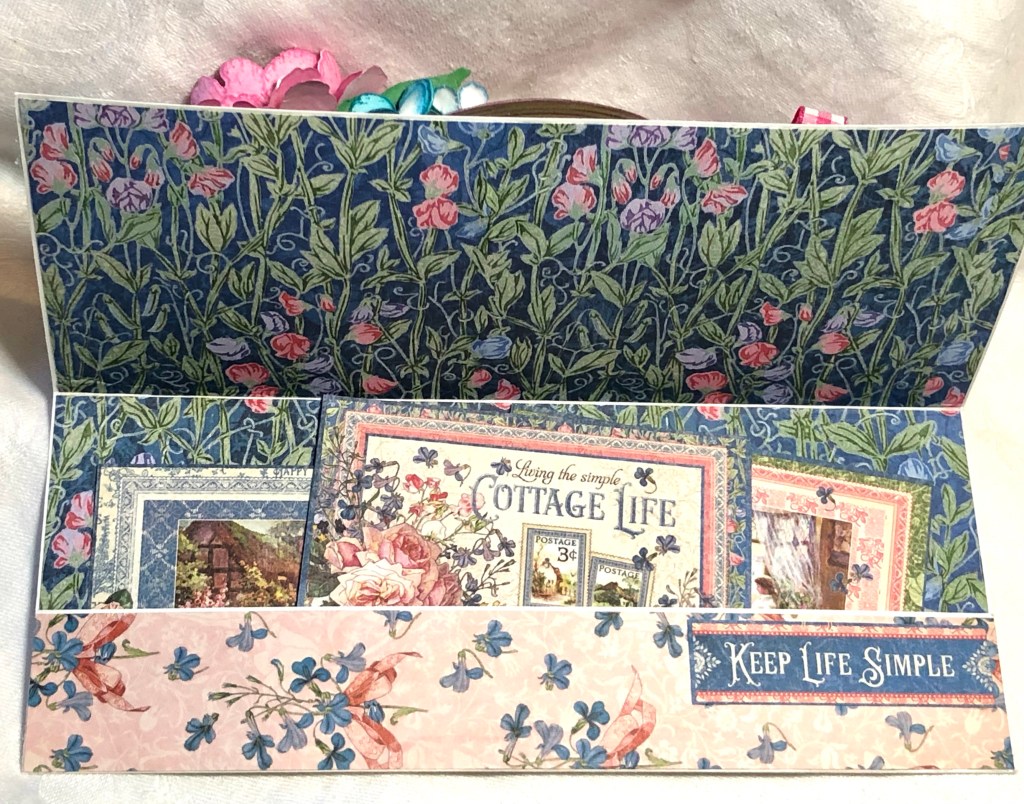
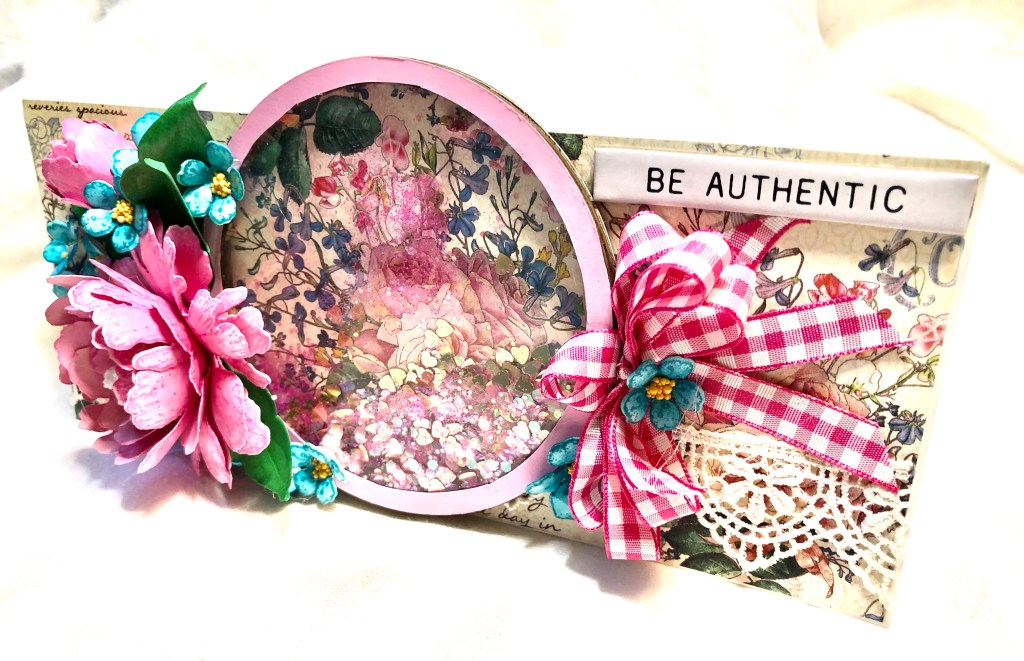
This second card is using Graphic 45’s Cottage Life paper, and it does feature a shaker box, that came from a kit.
I think this card is my favorite of the two, because I just love how the flowers came out!!
Thanks so much for stopping by, and taking a peek at my creations!!