Mini Tunnel Album with Graphic45 Fairy Dreams/Wishes

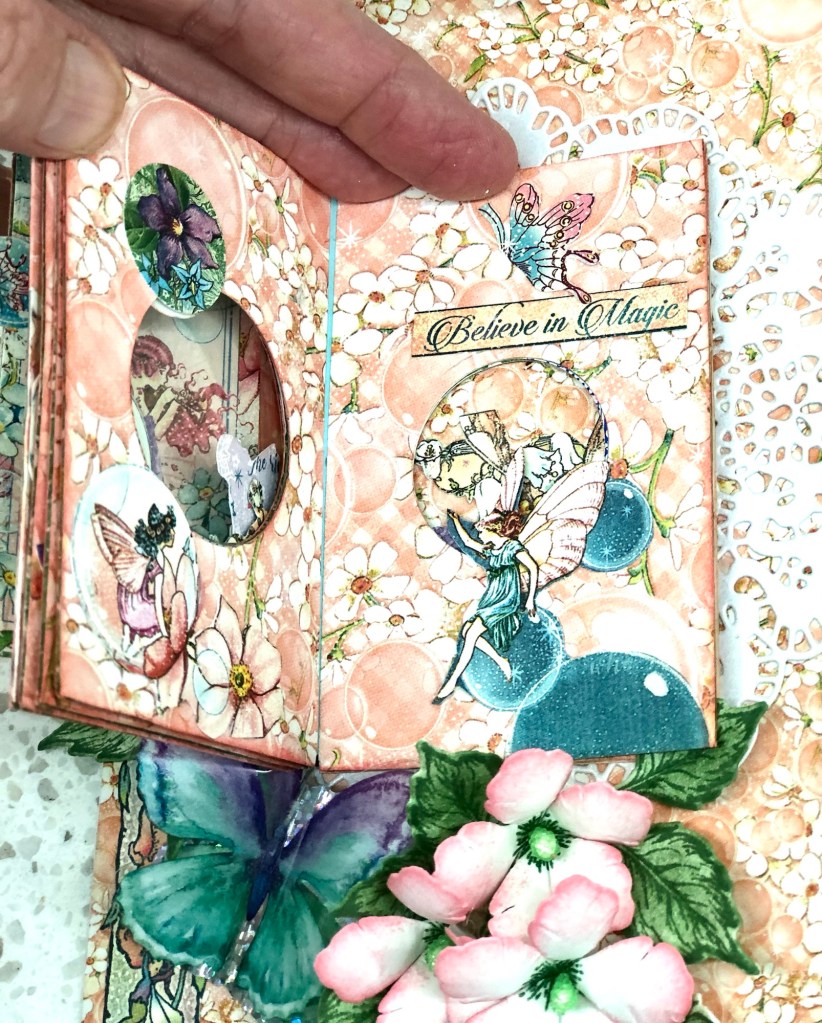
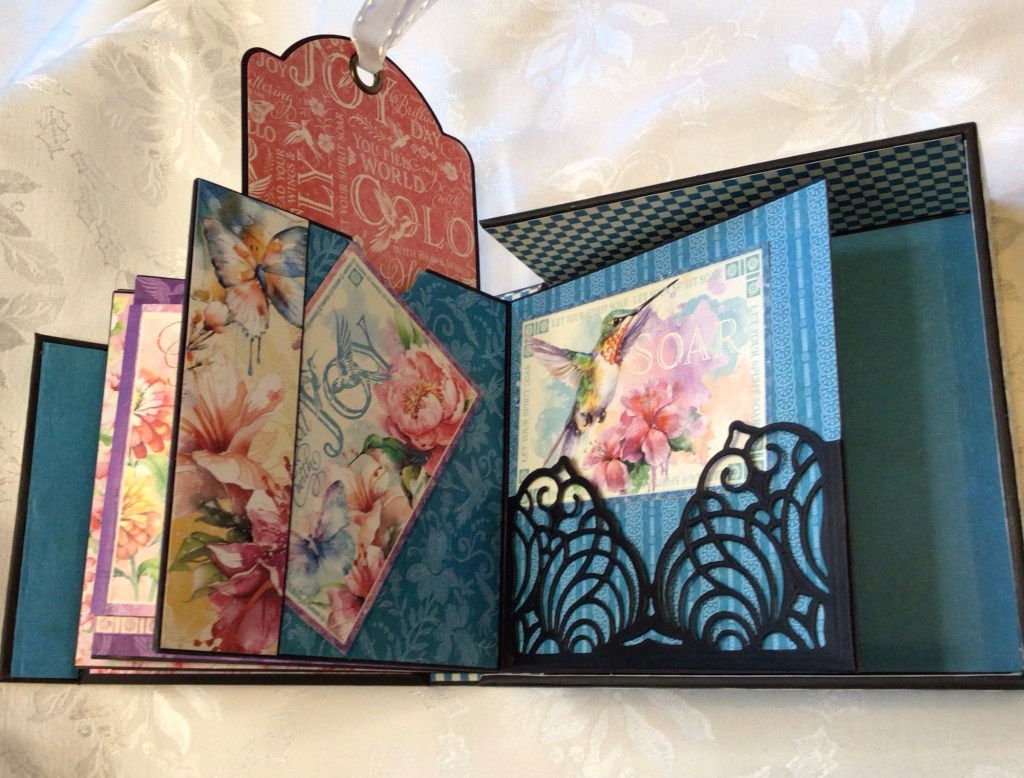
I saw a video of someone making a tunnel album which was ATC size (about 2×3”) and thought this paper would be fantastic for it! So many of the images are tiny anyway, since they are fairies, after all.

The hardest part of this was getting all the pages to line up – even with a tutorial, I had trouble, but lucky for me, I am also stubborn!

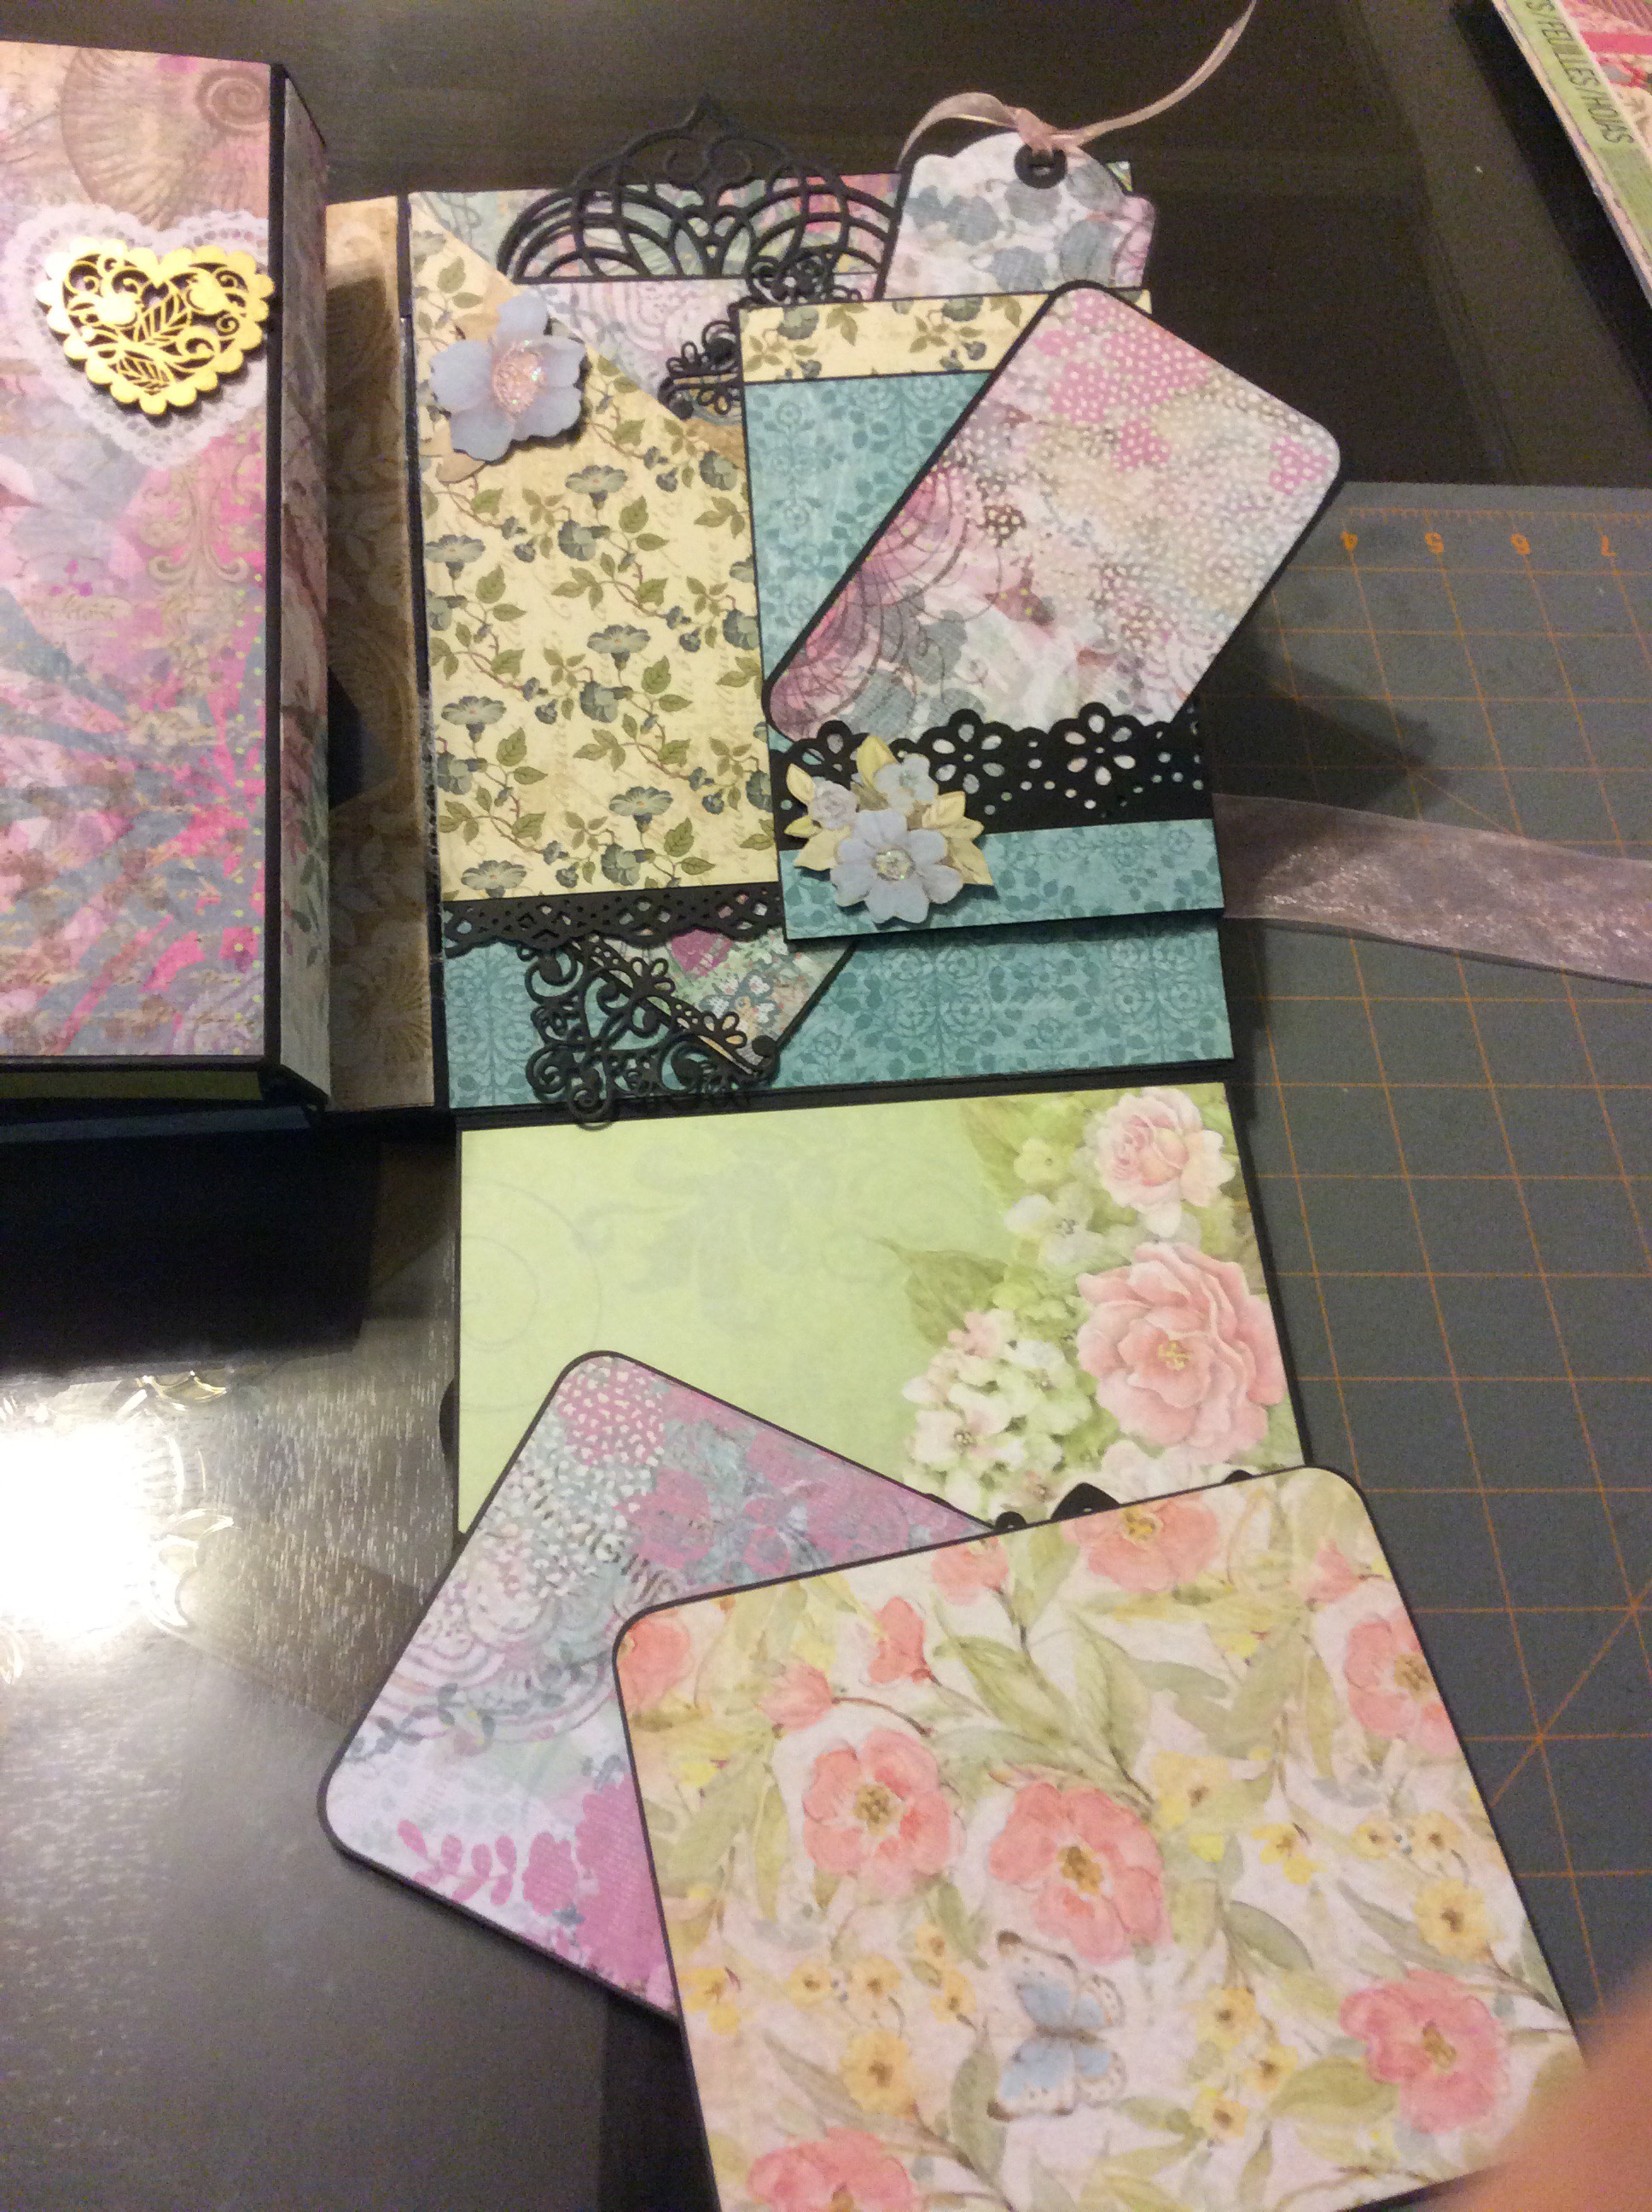
I didn’t quite know what to do with it once I was finished – this paper has been discontinued, and I was working with scraps as it was – the image I was trying to emulate had the mini album on top of a much larger (but still mini-sized) photo album, and I didn’t have nearly enough paper to pull that off, so decided to create a card, and instead of the emphasis being on my dimensional flowers, the emphasis is on the mini tunnel album.

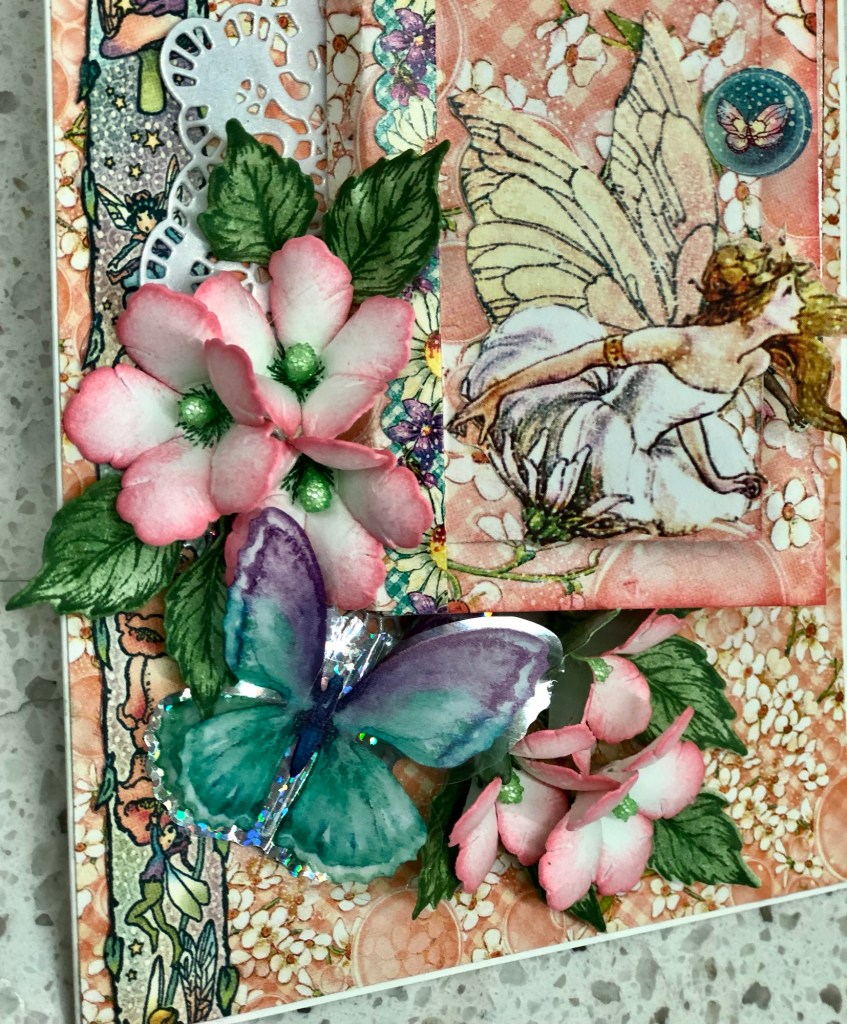
The butterfly is from my stash, picked it up at a hobby shop quite a while back, and flowers are from Heartfelt Creations – theoretically small petunias, but I just turned them into blossoms.

Personally I think it’s adorable, but I know I’m biased! Thanks for stopping by and looking!!

Album in a Box with G45’s Flight of Fancy

Having too much fun over here – we had a tornado come through town, devastating many homes and businesses – not mine, but the power was out at my office, so I got a free week off from work! Guess what I did, while forced to stay home? Yup!

I didn’t realize how much I was going to love the Album in a Box, but this turned out so darn cute! And I stepped away from my usual, didn’t do ANY dimensional flowers – so the album can fit on my bookshelf without my worrying that I’ll smush something!

Pretty much all the album requires is cutting and pasting – kind of like kindergarten, with a twist! Enjoy!

If you would like to see a mini video walkthrough you can check out my YouTube channel here: https://youtu.be/-1a2LhuniHI?feature=shared

Thanks for looking!!

My First Insta-Album

I finally finished my first Insta-Album. I was super excited when HC came out with it on Black Friday (2018), but unfortunately had other pressing obligations (like Christmas! hello!) and so I didn’t really get to dive into it until late January. I’ve had a lot of fun figuring out where everything should go, and using the new mini-pocket dies that really dress up the album.

I also had quite a bit of fun making the flowers, and I wanted to do the album paper justice, since there really isn’t any room to put dimensional flowers inside the album, the outside is all I had to work with.

Here are a couple of pictures of my flowers:

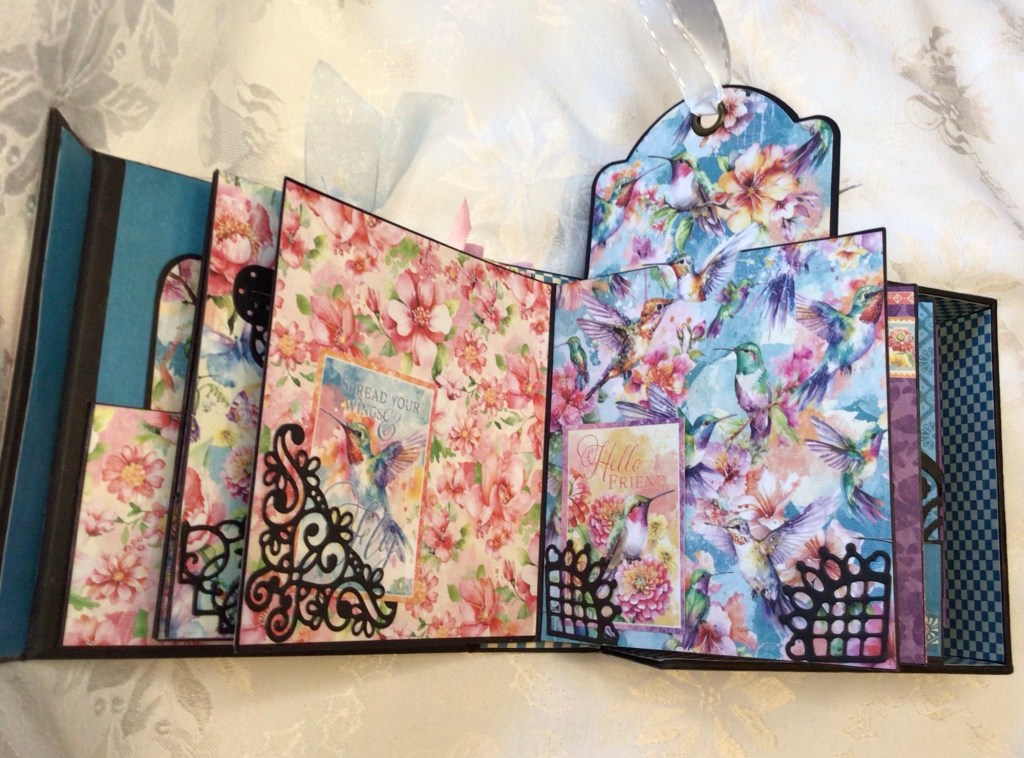
These are just simple little pre-made flowers you can get at any craft store, which were happily, near the exact size of the roses on the paper. The little white blossom are simply punched flowers with a single prill for their centers.

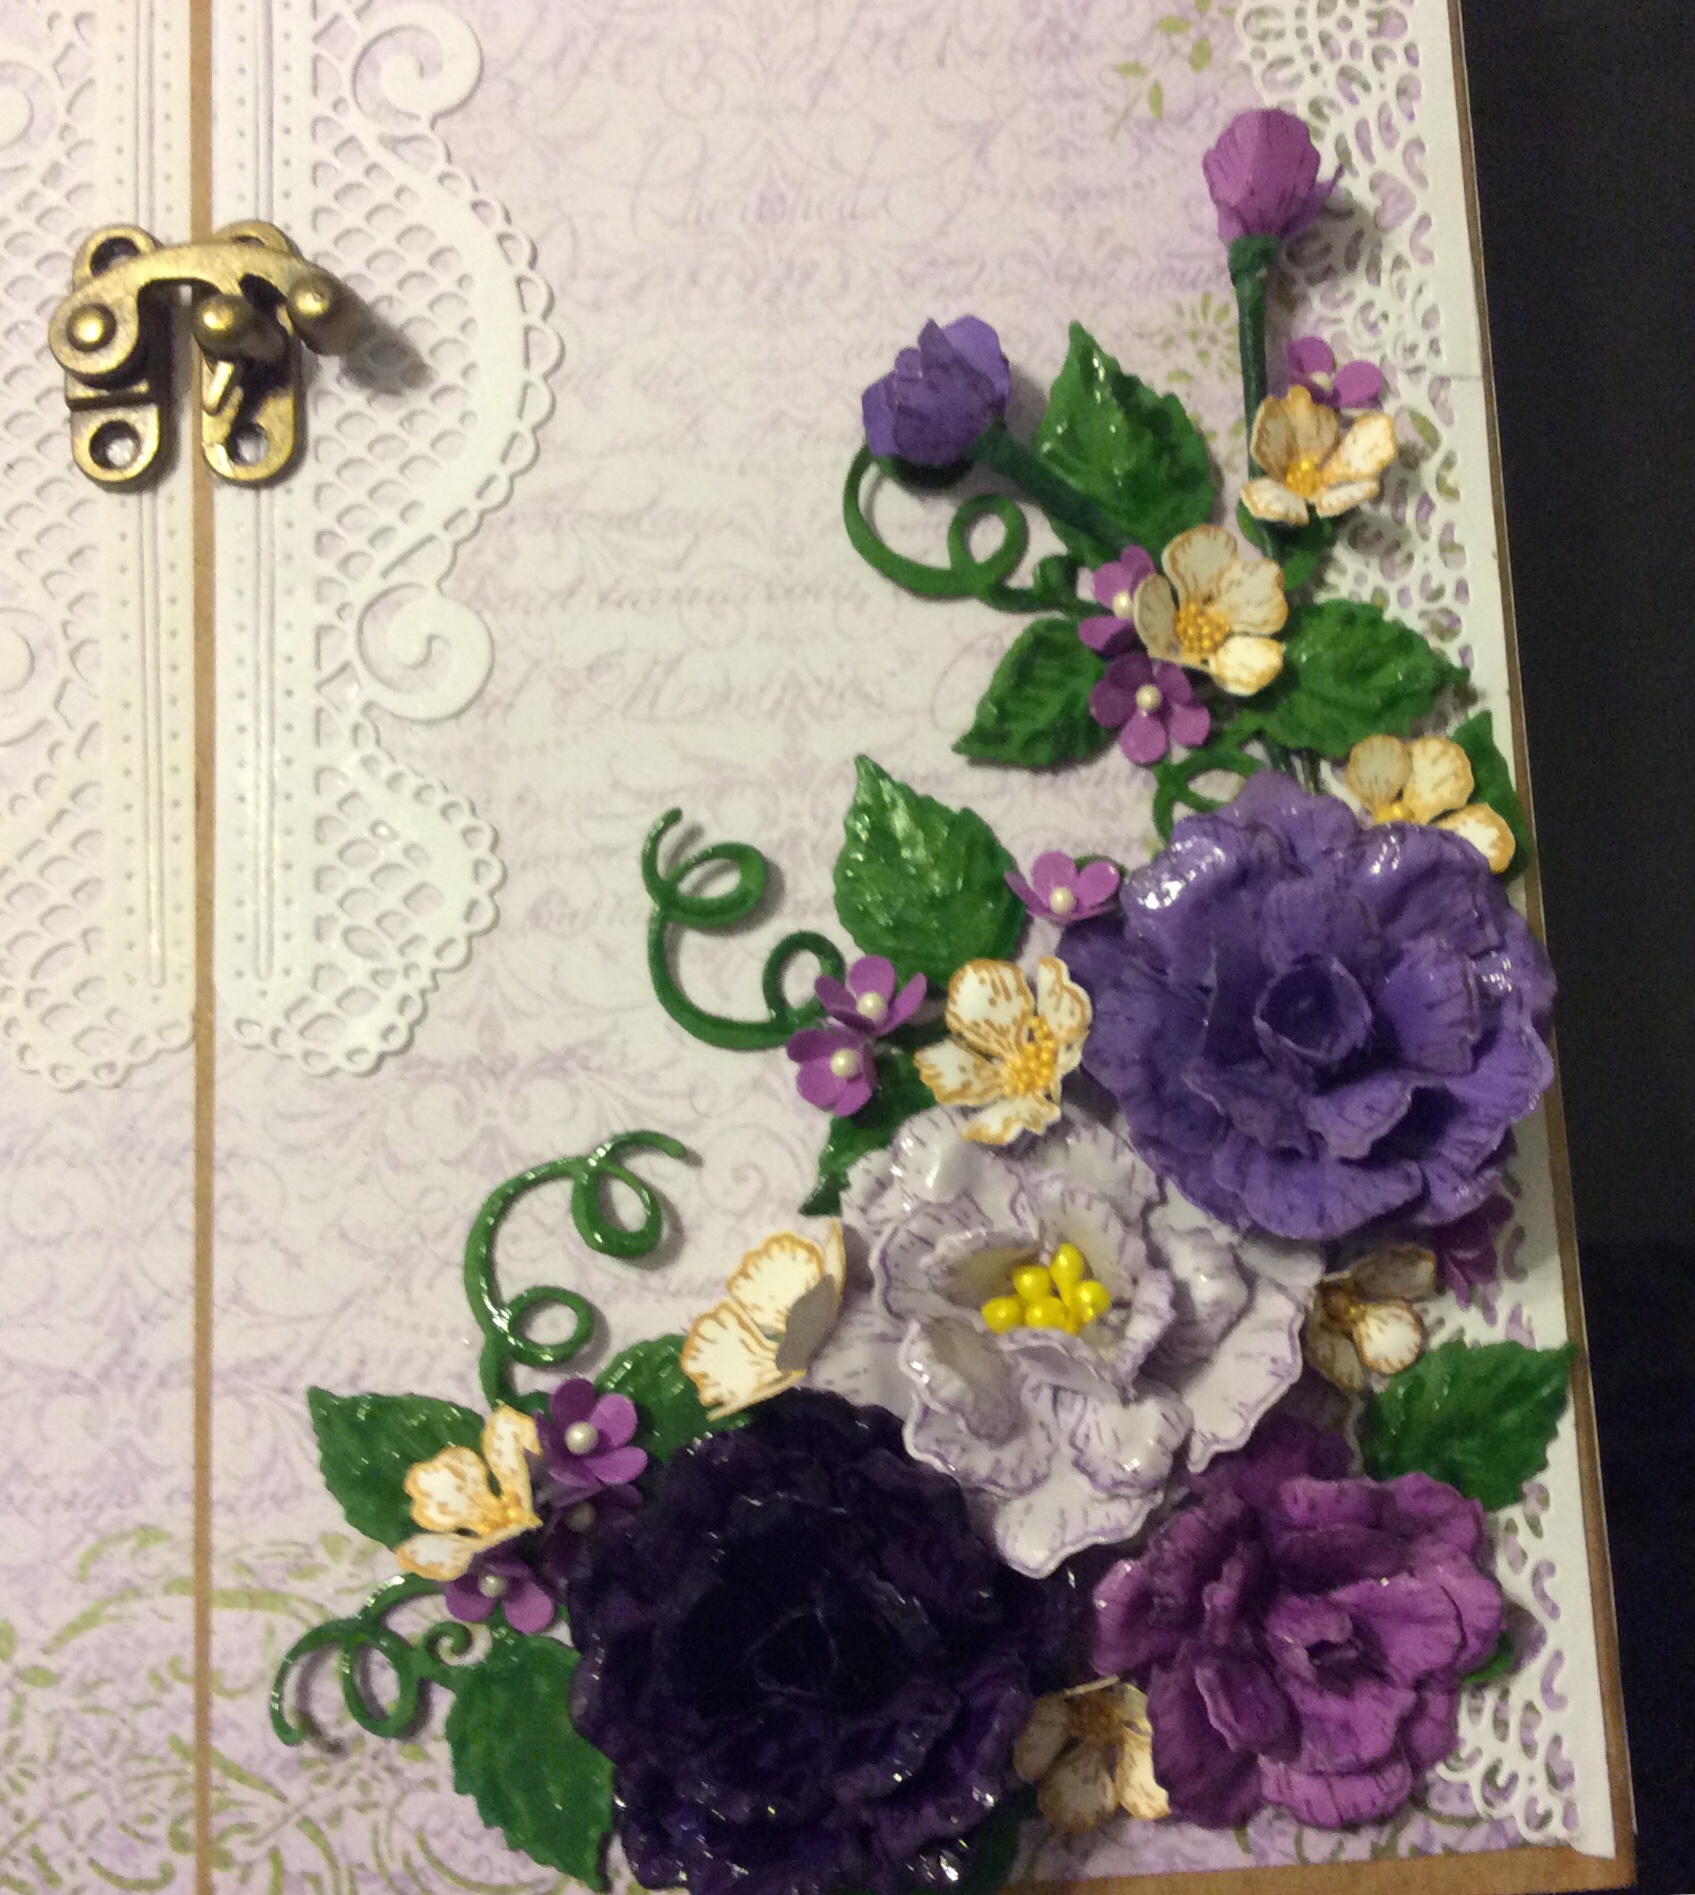
Now these flowers are all hand made, and we used some glossy accents on them as well. The rose buds on the top left are wired with florist tape holding the paper, and acting a bit like the base of the flower.

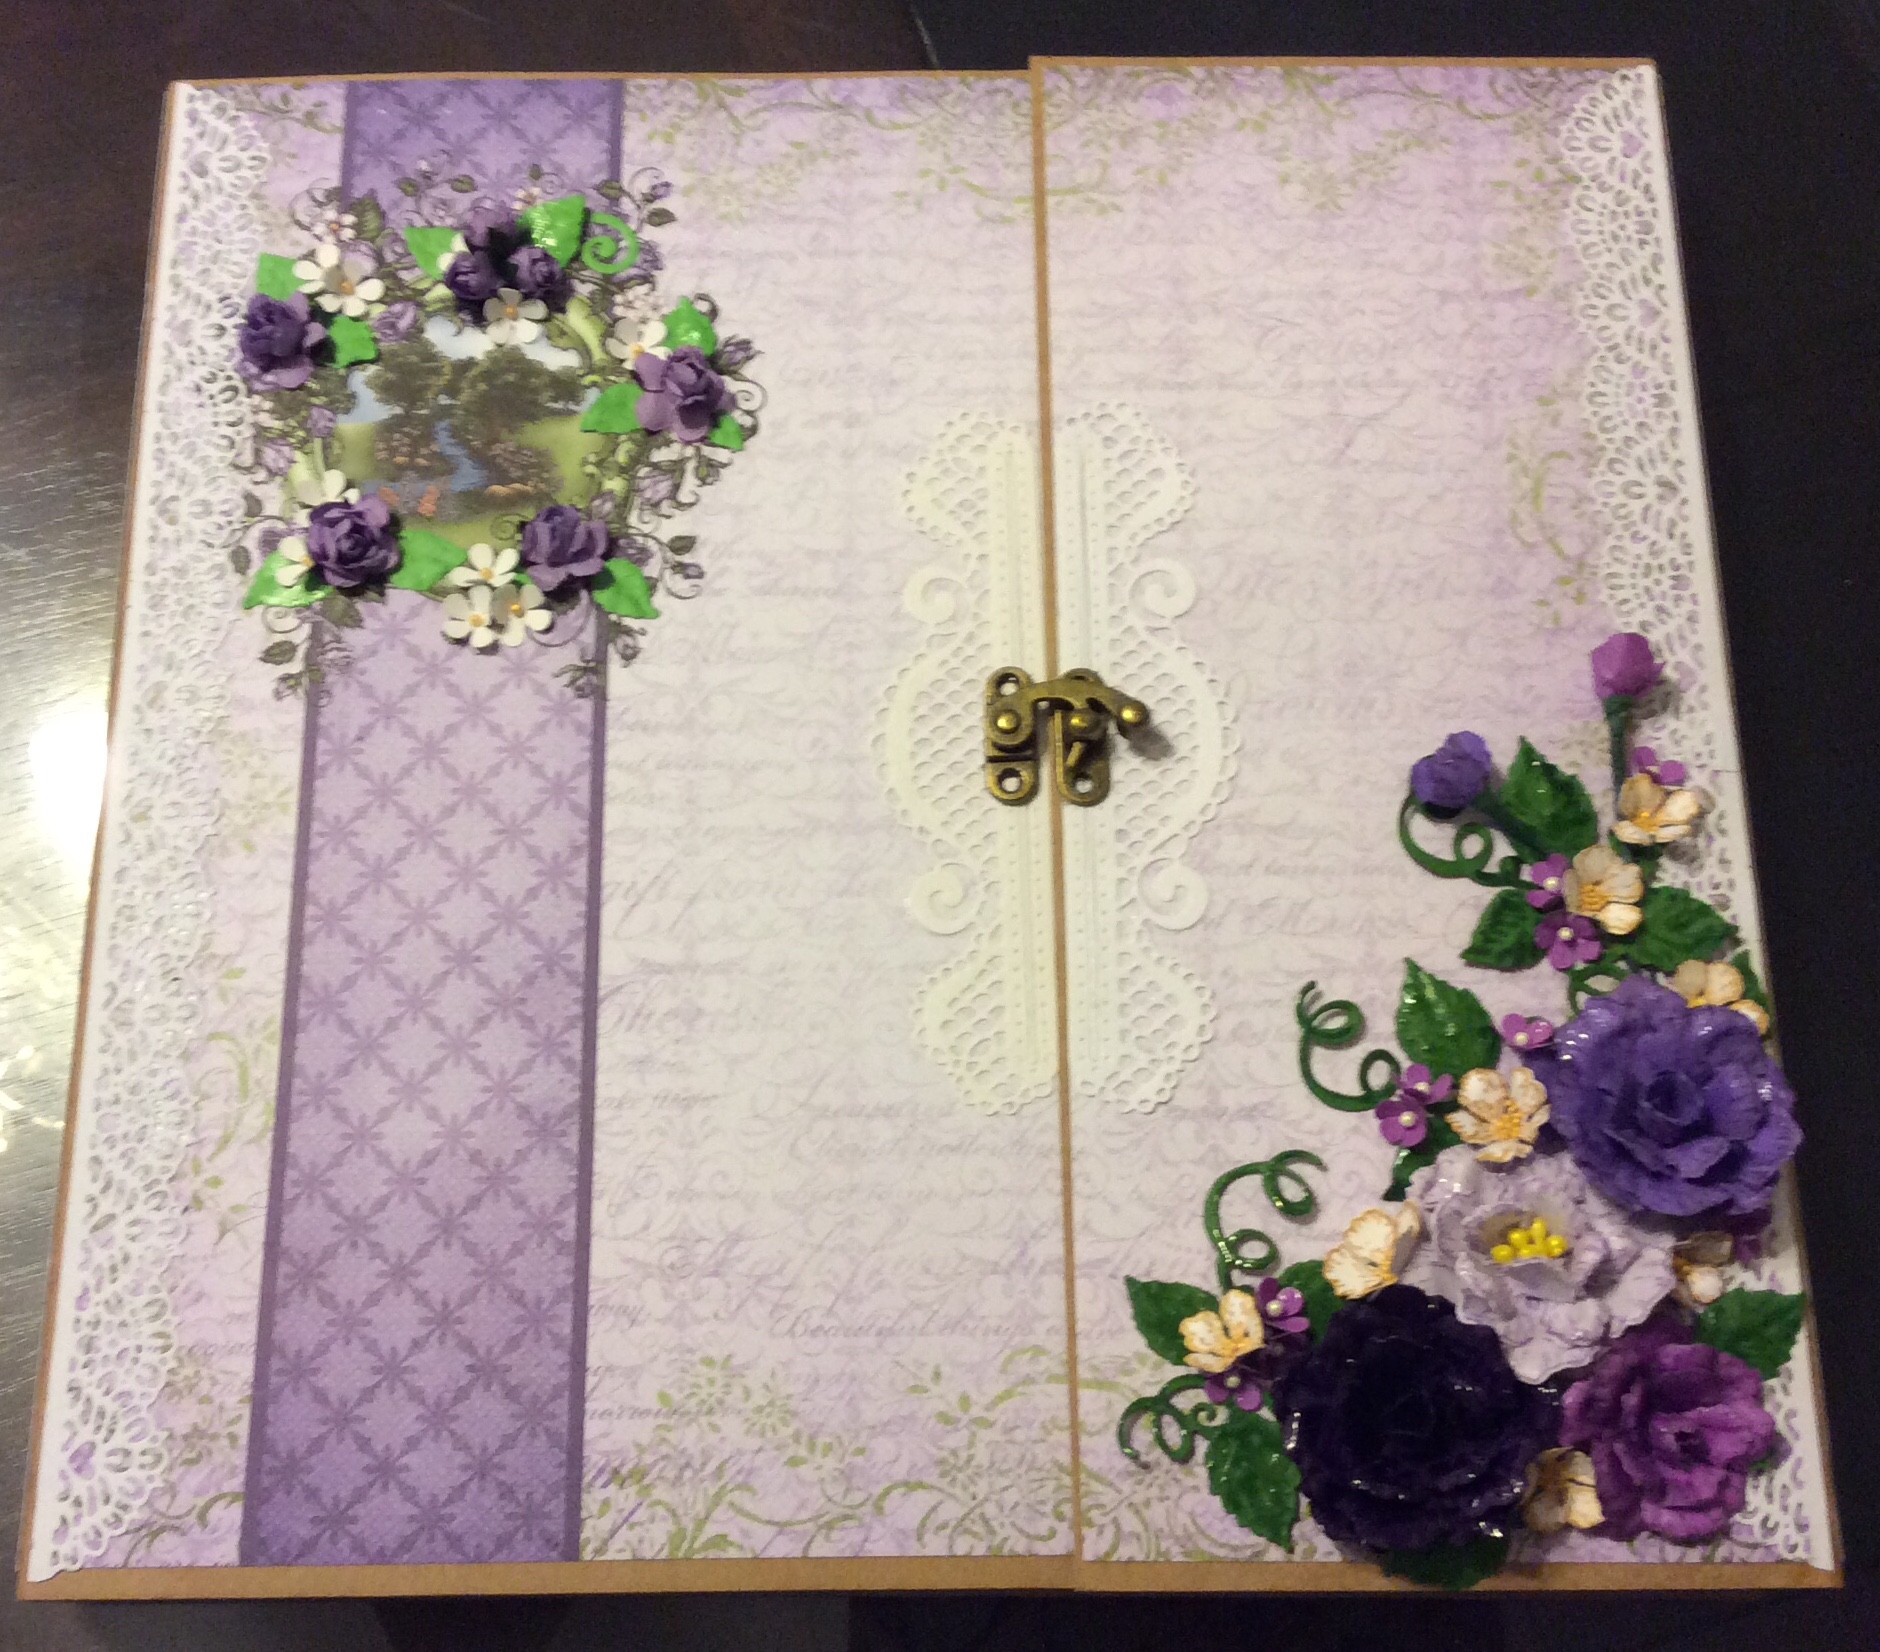
Here’s the whole thing. I think it turned out rather pretty!

If you’re interested in the inside, check out the YouTube video here:

4 Panel Scrapbook

So I decided to play a little with some older paper pads I had lying around. These are beautiful papers From K&Company, but unlike Heartfelt Creations, Graphic 45 , Stamperia and the like, although they have a design on both sides of each paper, there are no pages set up as ephemera, or just right to make a card. These are beautiful though, as you will see.

First I built up the album using black chipboard, which I covered with black cardstock. And since this was just an experiment, I actually used black duck tape to tape them together. Four panels of 9″x7″, one 9″x3″, and two 9″x1″. In retrospect, the thinner panels should’ve been 1.5″ wide, because as things were added it was getting kinda fat!

So that’s the front. I borrowed from several scrapbooks and portfolios to pull this off. I also use a lot of punches from Martha Stewart, and die cuts that I get from everywhere, DiesrUs, G45, and Spellbinders too.

Page one and two:

Pages 3 & 4 – obviously you’ll have to watch the video to see everything!!

And finally the last two “pages”! I had a lot of fun designing this project. I have no idea, but imagine you could easily put 100 photos in here.

Hope I’ve inspired you!!

Check out the video here. Have a great day!

Italian Riviera Mini Album

I’m sharing another mini album with you today. I made this one several months ago for my mother, and gifted it to her for Christmas. (I’m not sure she knows exactly what to do with it, as she generally keeps her photos on her phone.). Once again this is from the Heartfelt Creations paper collection, this one is called Italiana Riviera, and it has a very purple theme, my moms favorite color (I think). We had some difficulties making this album, especially the gate that you will see around page 10 or 12.

I’m really enjoying the crafting of these mini albums, they are a great creative outlet for me, especially as I’m not an artist at all ( I can’t draw much more than stick figures!) but if I cut and paste carefully (hello, kindergarten!) I can create a thing of beauty.

Some of the tools that I have acquired, and spend money on are Scor-tape, and those amazingly strong neodymium magnets. Follow the links and you’ll see where I get them.

Here’s the album. Hope you enjoy it!